Thursday 30 March 2017

Zesty Italian Dressing and Marinade Recipe

Homemade Zesty Italian Dressing

I have a bit of a love affair with salad dressings, and Italian dressing is no exception. In fact before my switch to healthier foods, ranch was about all that got me to eat raw broccoli. Thankfully my journey to real food brought me to love all kinds of salads even without a lot of dressing....

Continue Reading...Zesty Italian Dressing and Marinade Recipe


source https://wellnessmama.com/15877/italian-dressing/?utm_source=rss&utm_medium=rss&utm_campaign=italian-dressing

Erythritol: Is This Artificial Sweetener a Healthy Alternative to Sugar?

WM-Erythritol-MainImage

Now that sugar has become the devil behind many chronic health issues, health conscious people are turning to natural sugar alternatives. Erythritol is a sugar alcohol gaining popularity as a sugar alternative because it doesn’t have the after taste of stevia or the gastrointestinal side effects of xylitol. Because erythritol has the mouthfeel and taste of...

Continue Reading...Erythritol: Is This Artificial Sweetener a Healthy Alternative to Sugar?


source https://wellnessmama.com/155432/erythritol-safety/?utm_source=rss&utm_medium=rss&utm_campaign=erythritol-safety

DIY Herbal Hair Rinse for Shiny and Strong Hair

How to make an herbal hair rinse

Plenty of hair care commercials promise shiny, beautiful hair, but at what cost? This DIY herbal hair rinse recipe nourishes the scalp, boosts shine, and strengthens hair naturally without the downsides of chemicals and parabens. The problem with many hair care items, even many of the natural ones, is that they strip the natural oils from the...

Continue Reading...DIY Herbal Hair Rinse for Shiny and Strong Hair


source https://wellnessmama.com/156328/herbal-hair-rinse/?utm_source=rss&utm_medium=rss&utm_campaign=herbal-hair-rinse

Tuesday 28 March 2017

Is Yerba Mate Tea Better for You Than Coffee?

Is Yerba Mate Tea Better for You Than Coffee

Yerba mate tea boasts some surprising health benefits and may even replace your morning cup of Joe. Much like green tea, yerba mate tea is rich in polyphenols and antioxidants, and is quite tasty to boot. Coffee Is King Coffee is the undisputed king of all morning beverages. Readers ask my secret to getting things...

Continue Reading...Is Yerba Mate Tea Better for You Than Coffee?


source https://wellnessmama.com/157109/yerba-mate-tea/?utm_source=rss&utm_medium=rss&utm_campaign=yerba-mate-tea

How to Make Herbes de Provence at Home (Recipe)

Herebes de provence recipe

I am never without herbes de Provence in our kitchen. This mix of spices abundant in the south of France really speaks to my love of the delicious flavors of French cooking, and I use it in just about anything I can. My mom’s French heritage was a big influence growing up, and because of her...

Continue Reading...How to Make Herbes de Provence at Home (Recipe)


source https://wellnessmama.com/2051/herbs-de-provence/?utm_source=rss&utm_medium=rss&utm_campaign=herbs-de-provence

Monday 27 March 2017

73: The Truth About EMFs, WiFi, and Radiation (& How to Avoid Them!)

The Truth About EMF's, Wi-fi, and Radiation (& How to Avoid Them!)

There’s no doubt manmade EMFs (electromagnetic fields) are on the rise and growing by the minute in our technology-driven world. Cell phone towers, cell phones, laptops, Bluetooth, and WiFi hotspots are increasingly available on airplanes and everywhere else. What’s more, these signals grow in strength as technology “improves.” So, what to do … panic? Get rid of your devices? Far...

Continue Reading...73: The Truth About EMFs, WiFi, and Radiation (& How to Avoid Them!)


source https://wellnessmama.com/podcast/emfs-wifi-radiation/?utm_source=rss&utm_medium=rss&utm_campaign=emfs-wifi-radiation

Wednesday 22 March 2017

How My Kids Capsule Wardrobe Simplified My Life (& Laundry)

How Creating Kids Capsule Wardrobes Simplified My Life and Laundry

I must admit… when the capsule wardrobe trend took over Pinterest, I was mostly uninterested. As a mom, my wardrobe was based much more on functionality and had to be more variable. Times like pregnancy and nursing required certain types of clothes and the options were limited. Then, I discovered the kids capsule wardrobe and it changed...

Continue Reading...How My Kids Capsule Wardrobe Simplified My Life (& Laundry)


source https://wellnessmama.com/195162/kids-capsule-wardrobe/?utm_source=rss&utm_medium=rss&utm_campaign=kids-capsule-wardrobe

Simple Boys Capsule Wardrobe (Durable & Versatile)

Boys capsule wardrobe for sping and summer

I love the adventurous nature of children… what adventure does to their clothing though, not so much. All of my kids love to climb trees, fences, and anything else that’s around, but somehow it is always the boys clothing that ends up with the holes and stains. When we made the switch to basic capsule...

Continue Reading...Simple Boys Capsule Wardrobe (Durable & Versatile)


source https://wellnessmama.com/195297/boys-capsule-wardrobe/?utm_source=rss&utm_medium=rss&utm_campaign=boys-capsule-wardrobe

How to Create a Girls Capsule Wardrobe (Cute & Functional)

Girls Capsule Wardrobe for Spring and Summer

We recently switched to capsule wardrobes for our kids and will never look back! This minimalist wardrobe method has greatly simplified our lives! We love it and our kids love it too! (Specifics on all of the items we chose at the bottom of the post). Here’s why: What is a Capsule Wardrobe? A capsule wardrobe,...

Continue Reading...How to Create a Girls Capsule Wardrobe (Cute & Functional)


source https://wellnessmama.com/195161/girls-capsule-wardrobe/?utm_source=rss&utm_medium=rss&utm_campaign=girls-capsule-wardrobe

Baby Capsule Wardrobe (Works for Toddlers Too!)

Baby capsule wardrobe

With six kids, I’ve done my fair share of seasonal clothing changes and wardrobe organization. Without fail, the youngest kids are the toughest when it comes to clothes. I switched all of our kids to a capsule wardrobe system, but switching to a baby capsule wardrobe was by far the toughest. Baby Capsule Wardrobe… is it...

Continue Reading...Baby Capsule Wardrobe (Works for Toddlers Too!)


source https://wellnessmama.com/195394/baby-toddler-capsule-wardrobe/?utm_source=rss&utm_medium=rss&utm_campaign=baby-toddler-capsule-wardrobe

Tuesday 21 March 2017

Great Alternatives to Almond Flour and Coconut Flour

Other grain free alternaties to almond and coconut flour

When you go grain-free, you have to get creative to keep enjoying the foods you love. Most grain-free goodies are made with the same ol’ flours, but there are actually some really great alternatives to almond flour and coconut flour. I bet you haven’t even heard of some of them! While an optimal diet should...

Continue Reading...Great Alternatives to Almond Flour and Coconut Flour


source https://wellnessmama.com/147959/almond-flour-alternatives/?utm_source=rss&utm_medium=rss&utm_campaign=almond-flour-alternatives

Monday 20 March 2017

Perfect Hollandaise Sauce (With Just 4 Ingredients!)

Hollandaise Sauce Recipe

Mmmmm … butter and eggs whipped together until creamy, with a little tangy zip to boot! What could be more delicious? This hollandaise sauce is a regular at our table because it is easy to make and full of healthy proteins and fats, and our kids’ favorite sauce for its buttery flavor. (Because what kid doesn’t love...

Continue Reading...Perfect Hollandaise Sauce (With Just 4 Ingredients!)


source https://wellnessmama.com/2220/hollandaise-sauce/?utm_source=rss&utm_medium=rss&utm_campaign=hollandaise-sauce

72: How to Turn Off Cravings and Rewire Your Appetite with Robb Wolf

Wired to Eat - How to Turn Off Cravings and Rewire Your Appetite

Ever struggle to find a way to turn off cravings for junk food like cookies, candy, or soda … or even for healthy foods like whole carbs, sweet fruits, and dark chocolate? (‘Duh’ question, right?) If so, you are definitely not alone, and you needn’t feel guilty. You’re not broken. You’re just eating the way you’ve...

Continue Reading...72: How to Turn Off Cravings and Rewire Your Appetite with Robb Wolf


source https://wellnessmama.com/podcast/turn-off-cravings/?utm_source=rss&utm_medium=rss&utm_campaign=turn-off-cravings

Thursday 16 March 2017

5 Effective Natural Ways to Remedy Athlete’s Foot for Good

Natural remedies for athletes foot

Natural remedies for athletes foot

It’s no secret that we’re all about natural remedies around here. Every mom should have a few tricks up her sleeve for remedying minor ailments at home without resorting to harmful chemicals. Here are five natural remedies for a pesky problem that has ailed many of us from time to time … athlete’s foot.

Athlete’s foot is the skin condition most often associated with stinky, sweaty feet and gym locker rooms. However, it doesn’t just affect athletes.

How Does Athlete’s Foot Occur?

It may be surprising to learn that athlete’s foot isn’t just something that teenage boys catch. In fact, there is more to the root cause of athlete’s foot than infected showers or towels.

The body’s microbiome may actually have a lot to do with susceptibility to any infection, including athlete’s foot. Let’s first look at what really causes athlete’s foot.

What Leads to Athlete’s Foot

  • Coming into contact with infected people or items, like towels, a shower floor, or a swimming pool
  • Wearing tight, damp shoes
  • Overall bodily microbiome imbalance
  • Poor immune system function

So, while everyone knows that exposure to the fungus responsible for athlete’s foot (called tinea) promotes the spread of the infection, your own personal health may have a lot to do with how your body handles an exposure. When we have an overgrowth of harmful bacteria and fungi, we are more susceptible to infections of all kinds.

We have more bacterial cells than human cells, and it truly is all about the bacterial balance. I talk a lot about gut health and the importance of supporting the skin microbiome. The idea is that when your inner ecosystem is balanced, your whole body microbiome will be balanced, including the bacteria on and under the surface of your skin.

Symptoms of Athlete’s Foot

Athlete’s foot can actually mimic bad eczema or dermatitis, so it can be hard to differentiate between the two. Symptoms include:

  • Thick, red, scaly, or cracking skin
  • Itchy rash
  • Symptoms concentrated between the toes, where fungus is more likely to grow
  • Blisters
  • Discolored toenails

An Ounce of Prevention…

The best remedy is often avoiding the problem in the first place. Here are some ways to reduce the chances of athletes foot:

Wear foot coverings in wet public places, when possible.

Dry feet well when getting out of water, whether at home or in public places.

Wash towels if you suspect infection or if they’ve been used in a public place.

Mind your microbiome by eating a healthy diet, supplementing probiotics, and avoiding good bacteria-killing products like antibacterial soaps. (Read about how to mind your gut and overall health here.)

Five Natural Remedies for Athlete’s Foot

In the unfortunate event of getting this dreaded fungal foot infection, there are some great natural remedies that may help get it under control:

1. Internal Probiotic Remedy

Gut health affects so many aspects of overall health! Ramp up probiotics, avoid sugar and excessively starchy foods, and focus on nourishing foods like broth and sauerkraut.

Those who frequently battle infections, whether athlete’s foot or the common cold, may have an underlying gut issue. Our immune systems are responsible for fighting off infections, and while the occasional cold or flu gives them the workout they need to stay strong, fungal infections are more a symptom of imbalance. When our guts are imbalanced, our immune systems become weakened, and we become susceptible to infections.

Candida is a type of fungal yeast and is often at the root of lots of health conditions like eczema, arthritis, and allergies. While it is a natural strain that is found in everyone’s guts, problems arise when it becomes overgrown due to lack of beneficial bacteria. Doing a diet like the GAPS diet can help to eliminate harmful fungi and bring the gut back into balance.

Likewise, tinea fungus (the fungus responsible for athlete’s foot) is normal to have on the skin. However if our skin bacteria is out of balance, then our skin is more susceptible to infections.

Not only is it necessary to bring the gut bacteria into balance, but it may also be beneficial to balance the bacteria (microbiome) on the skin. (To learn more about nurturing the skin’s microbiome, check out this podcast.)

2. Topical Probiotic Remedy

While oral probiotics are beneficial to your gut and overall health, in the event of an acute athlete’s foot infection, you may find topical application of probiotics helpful.

Let’s take the same idea as this recipe for my probiotic face mask and make it the base for a natural remedy for athlete’s foot.

Mix together:

  • 1 TBSP plain organic yogurt (full fat preferred)
  • 1 capsule of saccharomyces boulardii (a beneficial yeast that has been shown to battle pathogenic species of fungi)

(Increase or double the amounts if necessary.)

Use a cotton ball to spread the mixture onto the infected areas and allow to sit for about half an hour.

3. Apple Cider Vinegar Remedy

The sour, tangy crunchy mama favorite that helps with everything from heartburn to dandruff can also be one of the best natural remedies for mild athlete’s foot.

Apple cider vinegar (ACV for those familiar with this crushed, fermented apple product) has been used since the times of Hippocrates, when it was prized for its medicinal properties. It’s known to be especially beneficial against yeast and fungus, and many people take it internally to keep candida in balance.

To use ACV to remedy athlete’s foot, make sure you’ve got a good, high-quality, unpasteurized version (the ones still containing the “mother” are better, and you can even make your own!). Of course you can also buy in stores or online, I get mine here.

In a foot bath container, mix together:

  • 2 cups of water
  • 1/2 cup of apple cider vinegar

Soak your feet for around half an hour. You can also apply plain ACV directly to the infection with a cotton ball. Apple cider vinegar will likely sting, so be aware and dilute more if necessary.

4. Essential Oil Remedies

There are a few essential oils that can be used to battle fungal infections, and skin conditions are one of my favorite uses of essential oils.

Anti-fungal essential oils include:

  • tea tree
  • lavender
  • oregano
  • thyme
  • geranium
  • clove

There are several ways you can use essential oils as natural remedies for athlete’s foot.

How to Make Your Own Salve:

Use this simple recipe for homemade healing salve to create your own anti-fungal salve by adding anti-fungal essential oils:

  • 2 cups olive oil or almond oil
  • 1/4 cup beeswax pastilles
  • 40 drops tea tree essential oil
  • 20 drops lavender essential oil
  • 12 drops each oregano and clove essential oils

To make:

  1. Heat the oil in a double boiler with the beeswax until melted and mixed.
  2. Add the essential oils and stir.
  3. Pour into small tins, glass jars, or lip chap tubes and apply to the infected areas as often as you think of it.

Apply neat or diluted.

Whether or not you use essential oils directly on the skin or dilute them is a personal and sometimes hotly debated choice. Because essential oils are highly concentrated, it is generally not suggested to use them directly on the skin.

However, some essential oils may be ok to apply neat, or directly on the skin, including lavender. The biggest concern in this case is applying the oil to broken skin, which would be painful and could cause further irritation. You can always check with a certified aromatherapist if you’re interested in using essential oils undiluted.

Otherwise, a good rule of thumb is 3-5 drops of essential oils per teaspoon of oil. Coconut oil is an excellent choice because it is also anti-fungal. Just combine any of the above anti-fungal essential oils with some coconut oil and apply to the infected areas.

Make an anti-fungal spray.

Combine anti-fungal essential oils with witch hazel to create a cleansing, healing astringent. Combine oils of choice in a spray bottle with witch hazel, keeping in mind dilution ratios, spritz on clean, dry feet, and then allow to dry. You could also kill two birds with one stone and add a little ACV to the spray.

5. Remedies for Footwear and Towels

It turns out sticking your sneakers in the freezer for about 24 hours may kill the fungus and prevent it from growing further. Additionally, you could use an anti-fungal essential oil spray like the one suggested above to spritz your sneakers and kill the fungus.

In addition to disinfecting your shoes, it is also a good idea to toss or disinfect any socks worn while infected, plus disinfect towels used.

To disinfect towels, wash on the hottest setting on the washing machine. Add anti-fungal essential oils, vinegar, or hydrogen peroxide to kill germs. In cases of persistent or recurrent athlete’s foot infections, consider throwing away items that may have come in contact with the fungus.

You Can Remedy Athlete’s Foot Naturally!

Most minor infections can be remedied at home without using harmful or toxic over the counter or prescription drugs. Athlete’s foot is no exception, and with these natural remedies for athlete’s foot, you’ll be fungus-free in no time!

Have you tried any of these natural remedies for athlete’s foot? Which have worked?

5 Effective Natural Ways to Cure Athlete's Foot for Good

Continue Reading...5 Effective Natural Ways to Remedy Athlete’s Foot for Good


source https://wellnessmama.com/156131/athletes-foot/?utm_source=rss&utm_medium=rss&utm_campaign=athletes-foot

Wednesday 15 March 2017

Healthy Irish Recipes for St. Patrick’s Day

Irish recipes for Saint Patricks Day

Irish recipes for Saint Patricks Day

May misfortune follow you the rest of your life, and never catch up!

-An Irish Toast

Since I’m Irish, I’ve always had plenty of Irish recipes in my arsenal. Of course these recipes tend to be heavy on starchy foods I usually avoid … especially around the 17th of March when mean green beer, Irish potatoes, and soda breads are in style!

Thankfully, over the years I’ve figured out some ways to adapt my favorite Irish recipes to our lifestyle. (Unfortunately, I’ve yet to find a good alternative to good beer … please tell me if you know of one!)

How to Make Healthy (and Tasty) Irish Recipes

healthy st patricks day recipesSince I switched to real food and cut back on potatoes and grains, I’ve had to find ways to fill the void using nutrient-dense substitutes. (This is actually my main strategy in the over 200+ recipes in my Wellness Mama Cookbook.)

As a general rule, I’ve found that mashed cauliflower makes a great substitute for potatoes, especially in these traditional dishes, and there are easy almond flour or coconut flour alternatives to most baked foods.

If you celebrate St. Patrick’s Day, put on the green, brush up on your toasts, and try one of these great recipes!

Sláinte!

The St. Patrick’s Day Menu (Take Your Pick!)

Try these real food takes on classic Irish recipes…

Corned Beef and Cabbage

A traditional Irish dish of beef brisket cured in a homemade brine, slow roasted in the crockpot, and served over sautéed cabbage and carrots. Brining your own brisket avoids the MSG and other chemicals found in store bought versions. (Don’t forget to start brining 3-5 days before St. Patrick’s Day!).

And yes, I know that this recipe is not authentically “Irish” in that it wasn’t invented and popularized in Ireland. It was predominately an Irish-American dish that was adapted to make an inexpensive cut of meat more tender and palatable. My Irish-American grandmother wasn’t technically only “Irish” either since she was born here (to Irish immigrants) but I would have dared you to tell her that! Corned Beef and Cabbage isn’t only Irish in the way that Pizza and Spaghetti aren’t purely Italian, but they still get credited to those cultures for good reason.

Shepherd’s/Cottage Pie

The savory meat and potato dish you know and love, made without the potato! Delicious ground beef or lamb, browned then topped with a hearty helping of vegetables and a mashed cauliflower seasoned with herbs. Finish with bubbling toasty cheese if not avoiding dairy.

Bangers and Mash

A classic Irish recipe featuring sausages and potatoes, but of course made without the potatoes. Mashed cauliflower to the rescue (again!), topped with browned sausage and delicious onion gravy … mmm!

Irish Champ

This one is so simple, there’s no need to post a recipe. Just make mashed “potatoes” with cauliflower like in the recipes above, but mix in a little extra butter and some thinly sliced green onions. Delicious and ready in a snap!

Dessert

And for dessert on St. Patty’s Day, there’s nothing like sipping on a Coconut Milk Irish Cream. This dairy-free Irish cream recipe uses Irish whiskey, coconut milk, honey, and a dash of coffee for a rich and delicious nightcap. Serve “on the rocks” or latte-style with extra coconut milk.

Happy St. Patrick’s Day!

An Irish Blessing

May you be poor in misfortune, rich in blessings,
Slow to make enemies, quick to make friends,
But rich or poor, quick or slow,
May you know nothing but happiness
From this day forward.

Do you celebrate St. Patrick’s Day? If so, what are your favorite food traditions?

These healthy Irish recipes for St. Patrick's Day are real food takes on classic Corned Beef and Cabbage, Shepard's Pie and Bangers and Mashed potatoes

Continue Reading...Healthy Irish Recipes for St. Patrick’s Day


source https://wellnessmama.com/2077/irish-recipes/?utm_source=rss&utm_medium=rss&utm_campaign=irish-recipes

Monday 13 March 2017

Healthier Irish Corned Beef & Cabbage Recipe

71: Winecast: All the Unusual Things We’ve Tried In the Name of Health

Winecast with Heather: Confessions of Unusual Things We’ve Tried in the Name of Health

Winecast with Heather: Confessions of Unusual Things We’ve Tried in the Name of Health

Join Katie and Heather for this tell-all episode of all the unusual things they’ve tried in the name of health! But there are two things they aren’t admitting to … care to guess? Leave your guess on the two things they won’t admit to in the comments!

In the Name of Health…

When a person is a health blogger, she tries some unusual things in the name of health (or because a blog commenter asked about it. Between the two of them, they’ve tried A LOT of unusual (and somewhat crazy) things in the name of health. In this episode, they fess up to all most of the strange things they’ve tried.

Weird Health Things They Have Tried:

  • Spraying bacteria on their skin (on purpose) – here’s why
  • Standing in a Cryotherapy tank at -280 degrees
  • Floating in a thousand pounds of dissolved epsom salts
  • Sitting in a chamber that gets up to 170 degrees to get heat shock proteins
  • Methods to increase their amount of brown fat
  • Mud baths (the photos have not surfaced … yet)
  • Brushing teeth with charcoal
  • Wearing orange sunglasses at night … even in public
  • The benefits of Sauna Therapy- See Heather’s post and Katie’s post on this

Resources Mentioned:

Podcast Sponsors:

This episode is also brought to you by Thrive Market. If you live in a real food desert like I do, it can be difficult to find certain organic foods, speciality foods, or allergy-friendly foods. Thrive Market is my solution to this problem. They carry thousands of the non-perishable foods that I use most often at discount prices. I think of them as a combination of Costco, Amazon, and Whole Foods. They are online like Amazon, have a yearly membership fee to unlock discounts like Costco, and carry high quality foods like Whole Foods.

I order from them regularly and highly recommend them. Check out all of their products and grab a free jar of coconut oil here.

This episode is also sponsored by The Wellness Mama Cookbook. My kids helped me test these recipes so they are definitely family-approved. They’re also mom-approved and here’s why.

I know what it is to be busy. I made sure the majority of the Wellness Mama Cookbook recipes can be made in under 30 minutes and many of them only one pan (who wants to wash dishes?). All of my 200+ grain-free recipes replace processed sugar and flour with nutrient-dense foods and vegetables kids love!

You can check out the cookbook at any major bookstore or on Amazon. I’m delighted to share my family’s favorite recipes with all of you!

So … weigh in, what are the two things you don’t think they will admit to?

Continue Reading...71: Winecast: All the Unusual Things We’ve Tried In the Name of Health


source https://wellnessmama.com/podcast/unusual-things-weve-tried/?utm_source=rss&utm_medium=rss&utm_campaign=unusual-things-weve-tried

Thursday 9 March 2017

The Hidden Problem with “No Poo” (And What to Do Instead)

The hidden problem with no poo- and what to do instead

The hidden problem with no poo- and what to do instead

As women, we tend to be finicky about our hair: all the curly-haired girls want straight hair and all the straight-haired girls want curls. But we all have one thing in common: the desire to have beautiful, healthy hair, preferably in a natural way.

Lots of naturally-minded folks recommend no poo, but is it really best for your hair?

What Is No Poo?

In case you’ve been living under a rock or you’re new to the crunchy mama crowd, “no poo” refers to your hair, not the other thing it sounds like.

Those who practice “no poo” are simply forgoing shampoo in favor of using baking soda to wash their hair. Typically, proponents of the no poo method suggest using diluted baking soda to give your hair a scrub, followed by a rinse of diluted apple cider vinegar.

It sounds like the perfect solution: natural and cheap. However, if you’ve gone that route, odds are, you’ll come to some bumps in the road sooner or later.

The Problem with No Poo

Baking soda sounds like a perfect choice for keeping your coif clean because it’s such a great cleanser. After all, I use it in my homemade cleaning supplies all the time. Try to use it for long though, and you’ll see why it isn’t right for hair maintenance.

Lots of us start out loving the no poo method: it seems to create manageable, clean, even bouncy, voluminous hair. But before long, many will start to notice something: dry, unmanageable hair. Breakage. Buildup. You might even be tempted to go back to conventional hair care products just to restore our locks to health.

There are a few reasons for things going south:

Baking Soda= Wrong pH for Hair

Because the natural pH of hair and skin is between 4.5-5.5, it is slightly acidic. With a pH of 9, baking soda differs vastly on the pH scale from hair. It is much more alkaline.

When you repeatedly wash your slightly acidic hair with a highly alkalized solution, you force your hair to drastically change its natural makeup. Eventually, your hair will become dry, frizzy, and begin to suffer from breakage.

The purpose for the apple cider vinegar rinse following a baking soda wash is to restore acidity to your hair. However, most people are unable to perfectly dilute and balance each step in order to restore proper pH. Not to mention, it’s difficult to evenly wash every strand of hair with each solution, making sure none are missed.

Baking Soda is Abrasive

Baking soda is one of the best natural solutions for scrubbing everything from tile grout to bathtubs. It is not great, however, for scrubbing hair. It’s simply too abrasive.

Just rub a little bit of the fine, white powder between your fingers and you can see why it does such a great job of getting things clean. The microscopic crystalline structure of baking soda creates jagged edges which scrub away at dirty surfaces.

You can imagine why setting those jagged edges to cleaning delicate hair might cause problems. Baking soda will eventually tear away at delicate tresses and cause damage, resulting in dry, breaking hair and split ends. Some no poo users have even reported losing clumps of hair.

It May Strip Hair of Natural Oils

Because baking soda is abrasive and too alkaline, it will eventually strip away the natural oils coating your scalp and hair.

That natural oil is present to protect your scalp and hair, keeping it healthy and manageable. Because we all have differing body chemistry and use different products, the amount of oil can vary greatly from one person to the next. That’s why some of us can get away with only washing our hair once in a while, and others can’t seem to go longer than a day between washes.

I found that when I switched over to natural hair care, my hair became more balanced: not too oily, not too dry, and I’m able to go longer between washes because my scalp and hair are healthy and happy. It can be normal for your hair to go through a period of detox as it adjusts to natural hair care, as conventional shampoos can also strip away those natural oils.

As your hair adjusts, it may become more oily or drier than usual, but as you settle on a natural hair care routine that’s right for your particular hair, it should even out.

However, don’t mistake your hair rejecting the no poo method for detox.

Your Hair Isn’t “Detoxing”; it’s Being Damaged!

Don’t keep scrubbing away with baking soda, hoping your hair will adjust! In many cases, the baking soda is actually causing damage to the hair. I’m certainly not a fan of most conventional shampoos, but they are designed to be the correct pH for hair.

What to Do Instead of No Poo

If you don’t want to thwart your healthy, natural hair care efforts with no poo, there are still lots of great natural hair care options.

No Poo Alternatives

1. Clay Based Shampoos. Who knew that putting clay in your hair could make it cleaner and healthier? I was a skeptic at first, but now often turn to clay based shampoos for my hair. I make my own detox shampoo but I also use this pre-made all-natural one from Morrocco Method and I really like it . (Use the code wellnessmama15 to get 15% off if you try it!) As a bonus, these products have a lot of added beneficial ingredients that nourish hair.

2. Make a shampoo bar. If you’re feeling adventurous, try your hand at making old-fashioned soap with lye. Find a specially formulated bar soap recipe for hair here.

3. Make a shampoo from soap nuts. Soap nuts aren’t just for laundry! Soap nuts shampoo is incredibly inexpensive to make and completely natural. Find the simple recipe here. (Note that this will not work on all hair types and seems to be the toughest to get right.

4. Make a dry shampoo. No matter the kind of shampoo, the science says fewer washes means healthier hair. Want to freshen your hair between washes while you’re figuring out the perfect no poo alternative for your hair? Try a homemade dry shampoo, with versions for both dark and light hair. Try this recipe.

Find What Works for Your Hair

Whether your hair is curly or straight, thick or thin, oily or dry, most of us will find that the no poo method isn’t ideal. However, we all have different hair care needs based on our own individual chemistry.

Experiment with the suggestions above until you find what works for your hair, then come back and let me know your results!

Have you ever tried “no poo?” Did you have any of the problems described above? Share below!

Find out why the "no poo" way of washing hair isn't best in the long run, and get the scoop on my favorite natural shampoo alternatives.

Continue Reading...The Hidden Problem with “No Poo” (And What to Do Instead)


source https://wellnessmama.com/147654/no-poo-problem/?utm_source=rss&utm_medium=rss&utm_campaign=no-poo-problem

Wednesday 8 March 2017

Root Canal: Dangerous or Just Misunderstood?

root canal

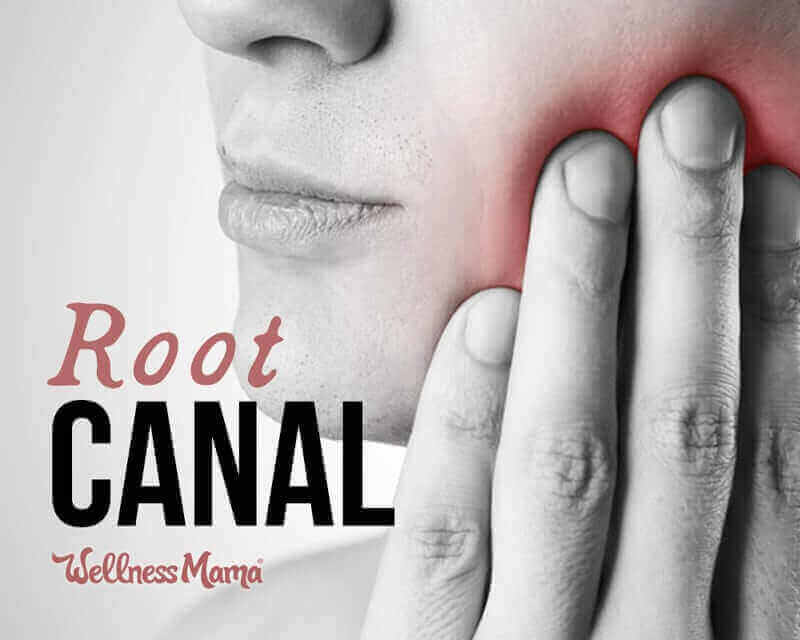
Root canals are a controversial topic in the dental world (if you didn’t know)! I’ve always had a fascination with studying oral health, and while I’m glad to have never needed a root canal (or an alternative), I felt it was good to research them and be prepared in case I ever did.

Many dentists consider the root canal—a dental procedure to treat deep dental cavities—to be a safe procedure, while other research has shown that root canals may allow dangerous bacteria to grow in the mouth and the rest of the body.

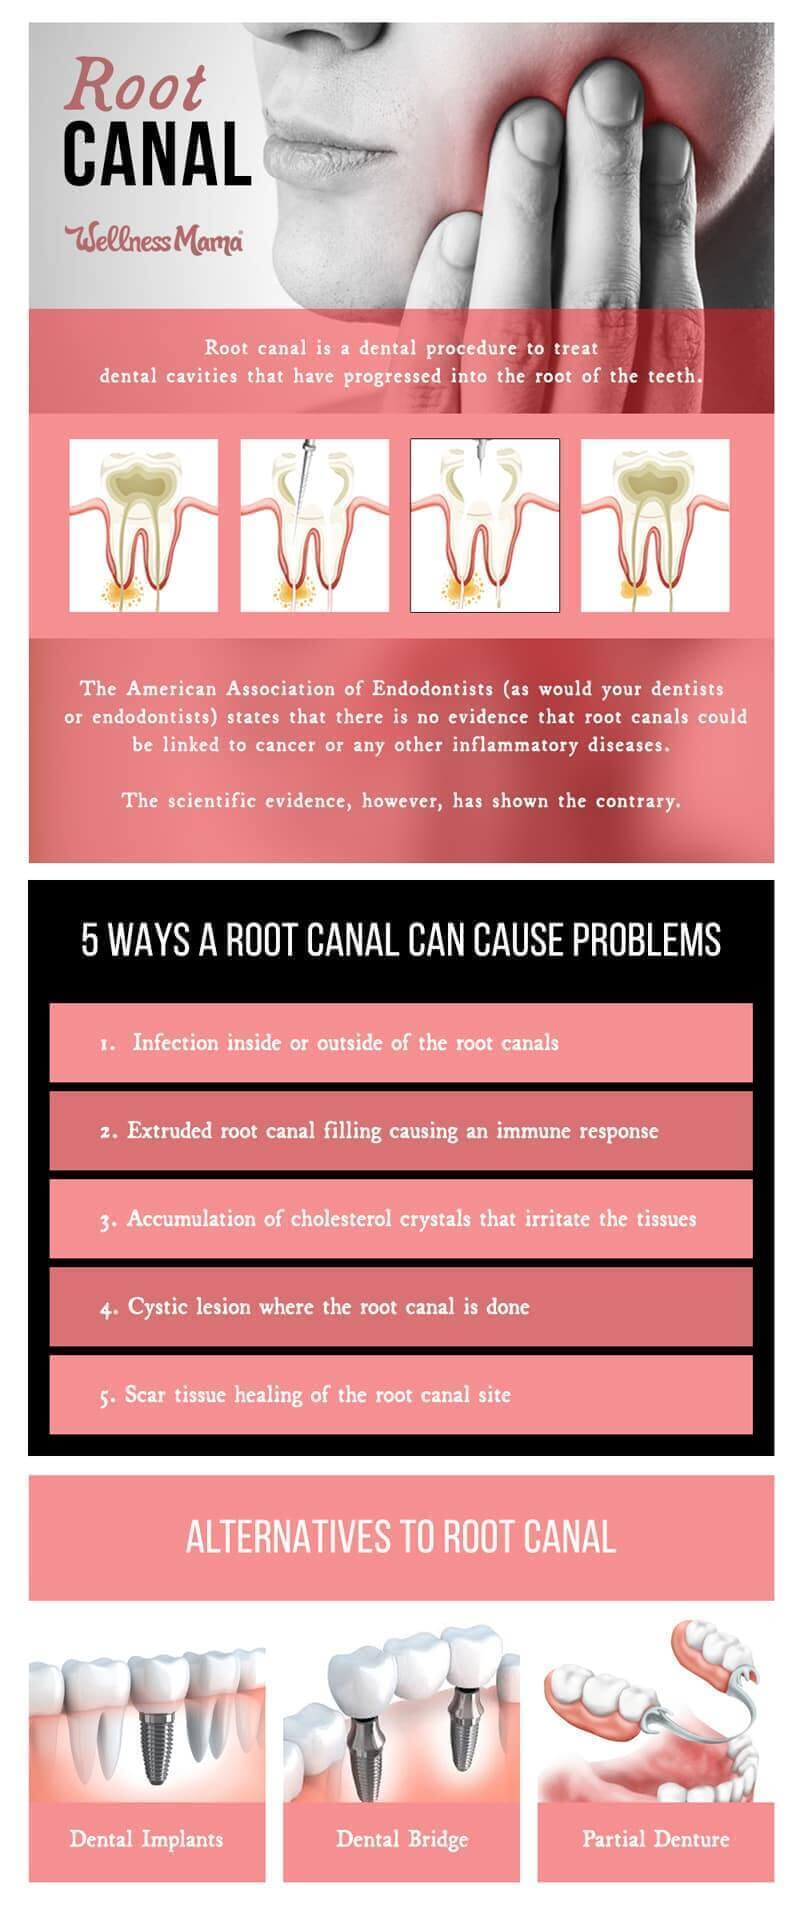
What Is a Root Canal?

Root canals are recommended for dental cavities that have progressed into the root of the teeth. The treatment of such cavities requires that all the infected pulp inside of the teeth be removed and cleaned, before the dental filling materials are injected into the tooth.

This allows the patient to keep the tooth, although the living tissue inside of the tooth is replaced, and the tooth is considered dead.

Is a Root Canal Safe?

This is where things start to get confusing, and it really depends on who you ask.

On the one hand, the American Association of Endodontists states that there is no evidence that root canals could be linked to cancer or any other inflammatory diseases. On the other hand, some scientific evidence shows there could be a potential for some pretty serious problems.

So Who is Right?

Let’s look at the data.

One study tested the effectiveness of root canal cleaning procedures and found endotoxins and pathogenic bacteria in 100% of root canals. The cleaning procedures can clear up to 44% of these bacteria, but the bacteria always persist.

The theory is that this could lead to long term problems, including some pretty serious ones. In fact, there are five ways that a root canal can lead to problems, including:

  1. Infection inside or outside of the root canals
  2. Extruded root canal filling causing an immune response
  3. Accumulation of cholesterol crystals that irritate the tissues
  4. Cystic lesion where the root canal is done
  5. Scar tissue healing of the root canal site

Even after the root canal procedure is long over, it appears that bacteria can (and often does) remain. This can logically lead to infections and other problems, and antibiotics are often given if needed. However, while antibiotic use presents its own side effects, one study has shown that antibiotic use does not significantly reduce pain and swelling. Overall, there is no strong evidence suggesting that antibiotics really helps with root canal infections.

The Problem with Lingering Bacteria

The bacteria (again, present in 100% of all root canals) can stimulate inflammatory molecules such as Interleukin-1beta and TNF-alpha, thereby raising inflammation throughout the body.

In severe cases, this can cause fever, malaise, and abscess or cellulitis in the head and neck area that may even require hospitalization.

Even without major complications, the bacterial toxins and inflammation can lead to seemingly unrelated health problems, as Dr. Weston A. Price discovered.

Weston A. Price on Root Canals

Dr. Price, a dentist known for his work on the relationship between nutrition and dental health (and overall health), was able to show that root canals can cause chronic diseases of inflammation by experimenting on rabbits.

Here’s what he did:

He conducted a series of experiments on rabbits, using extracted teeth from people with various health problems. His research found that rabbits would develop the condition that the person with the tooth had.

In other words: when using a tooth from a person with heart attacks and arthritis, the rabbit implanted with the root canal tooth would develop heart attacks and arthritis within a few weeks.

Back to the Bacteria

The bacteria that are found inside of root canals include groups of bacteria called Fusobacterium, Parvimonas, Prevotella, Porphyromonas, Dialister, Streptococcus, and Treponema.

Many of these bacteria are naturally present in the mouth, but they only become a problem when we are infected with them. When they grow in the root canal, the anaerobic conditions inside the root canal can cause these bacteria to become more dangerous. In addition, the ecosystem of these bacteria can make them even more dangerous.

These Bacteria, in the Context of Periodontal Infections, are Linked to Many Chronic Inflammatory Diseases:

Because these bacteria are transmissible, it explains why the exact same diseases could be transmitted from humans to rabbits by tooth transplantation in Dr. Price’s experiments.

This list of links between root canal bacteria and diseases is by no means exhaustive, but the literature has consistently shown that the infections of these bacteria in the mouth are linked to chronic inflammatory diseases.

Root Canals: What to Do?

After researching, I would personally choose not to get a root canal if I was ever told I needed one. There are some less well know alternatives, but they also all present their own challenges. The best option, of course, is to maintain optimal oral health as much as possible and hopefully never have to make this decision.

Pros and Cons of Getting a Root Canal

Unfortunately, when a tooth has progressed to the point of needing a root canal, there aren’t any really great options. And even within the dental community, the recommendations vary widely. As this article explains:

Dentists who speak out against the safety of root canals bring up 3 main concerns:

1.  There is no way to completely remove all the dead tissue from the tooth
2.  There is no way to sterilize the tooth, thus leaving bacteria in the tooth
3.  The materials used to fill the hollowed out tooth leak and cause problems ‘downstream’

Those in the profession who claim that root canals are safe claim:

1.  Enough of the tissue is removed
2.  The body’s immune system can better get on top of any existing infection
3.  There are improved substances to fill the tooth
4.  There are no other suitable options

Alternatives to Root Canal Treatment

As explained above, the bacteria present in dental cavities can be quite dangerous. Deep dental cavities should certainly be taken care of, especially those that have the potential to infect deeper in the jaw.

So if a root canal isn’t the best option, what is?

Some holistic dentists suggest that if the dental cavities are deep, the tooth should be extracted with the periodontal ligament removed to prevent further infections. Of course, this leaves a person without a tooth, though there are now several options if a tooth has been removed, such as:

Dental Implants

The tooth with cavity is removed and replaced with a metal implant. It still remains controversial whether the implantation of metal to replace the tooth can cause problems as this can raise the levels of such metals in the body and cause an immune response.

Dental Bridge

This may be a safer option than dental implants since the metal is not implanted into the gums in the same way.

Partial Denture

A removable denture to replace the extracted tooth is the least invasive option.

Existing Root Canals

There is enough information (and enough conflicting opinions) when it comes to root canals to make a person’s head spin! Hopefully,  the emerging research will shed some light on the safety of root canals in the future, but what about people who already have one or more?

A modern day researcher, Dr. Boyd Haley at the University of Kentucky completed follow up research to Dr. Price’s work and his findings are telling:

Roughly 25% of the root canal teeth studied had bacteria within them which produced toxins that were fairly benign.  50% of the teeth studied contained bacteria within their structure that would challenge a healthy immune system.  The last 25% of the teeth contained bacteria which produce toxins more powerful than botulinum (Important note, botulinum is widely recognized as the most toxic substance known to humans).  This bears repeating.  25% of the teeth Dr. Haley studied contained a toxin stronger than the strongest toxin known to humans…

Find a Dentist Who Understands the Research

Because every dental procedure comes with a risk (not to mention the expense), it is best to consult a biological dentist who is well-versed in Dr. Price’s work.

Many holistic health experts, including Dr. Mercola and many of his dentist colleagues, recommend removing the infected teeth and root canals, even if they look and feel fine. One source said that Dr. Haley who did the above study had his teeth with root canals removed after completing his study.

Lasting Effects

Thanks to modern lifestyles, we all know that the incidences of heart disease, Alzheimer’s, and diabetes are on the rise. Based on the research of Dr. Price and Dr. Haley, it appears that root canals may contribute to a subset of the cases.

Personally, I’d choose to have a tooth pulled instead of getting a root canal if I ever had to make the choice. I’d rather lose a tooth than have a risk of long term inflammation and other conditions (of course, once you’ve gotten a cavity, starting on a remineralization routine is a good way to keep from needing a root canal in the future).

Some sources suggest that if it isn’t possible to avoid or remove a root canal, certain lifestyle factors may help mitigate any potential problem. In fact, these are things we should probably be doing anyway, including:

  • Eat a low inflammatory diet
  • Manage stress
  • Maintain gut health
  • Try plant extracts like aloe vera, rosemary, or eucalyptus that have some antimicrobial extracts against bacteria that infect the teeth and root canals. (However, there is no clinical study demonstrating the safety and effectiveness of these substances in real human root canals, as we still don’t know how well these substances … or even antibiotics … can reach the blood that flows in that area.)

Root Canals: Bottom Line

Root canals are a tough subject. There certainly isn’t a clear and completely safe solution. I think all dentists would agree that the best scenario is to have great oral health and avoid ever needing this controversial procedure if at all possible.

For those who already have or need a root canal, it may be helpful to find a trusted dentist to help explore the options.

Additional Reading & Resources

What’s your take on root canals? Please weigh in in the comments below.

root canal infographic

Sources:

http://www.aae.org/rootcanalsafety/
https://www.ncbi.nlm.nih.gov/pubmed/17949345
https://www.ncbi.nlm.nih.gov/pubmed/16584489
https://www.ncbi.nlm.nih.gov/pubmed/24967571
https://www.ncbi.nlm.nih.gov/pubmed/25522939
https://www.ncbi.nlm.nih.gov/pubmed/25205261
https://www.ncbi.nlm.nih.gov/pmc/articles/PMC3623375/
https://www.ncbi.nlm.nih.gov/pubmed/23554416
https://www.ncbi.nlm.nih.gov/pubmed/25227214
https://www.ncbi.nlm.nih.gov/pmc/articles/PMC4557240/
https://www.ncbi.nlm.nih.gov/pmc/articles/PMC3623375/
https://www.ncbi.nlm.nih.gov/pubmed/24837500

Continue Reading...Root Canal: Dangerous or Just Misunderstood?


source https://wellnessmama.com/139664/root-canal/?utm_source=rss&utm_medium=rss&utm_campaign=root-canal

Monday 6 March 2017

How to Make Real Corned Beef Brisket (Recipe)

70: All Bone Broth Is Not Created Equal with Justin Mares of Kettle & Fire

I’m a big fan of homemade broth and it is one of the first foods my babies get. I use it often in cooking and sometimes just drink a mug of it. Thanks to the Instant Pot, it has gotten even easier to to make homemade bone broth … but as busy moms we all need shortcuts we can feel good about and I recently found a non-perishable bone broth that I always keep on hand!

Today I’m talking with Justin Mares, one of the founders of Kettle & Fire, who tells the story of why he and his brother Nick chose to get into the business of making better bone broth commercially available.

I’m sure making and packaging “real” bone broth was a challenge. This stuff gels up just the way homemade would in the fridge … and I can’t think of any other packaged bone broths I can say that about!

Kettle & Fire: Beginnings

Most of us probably started our journey into wellness and better food because of a health problem that needed solving. Justin Mares and his brother Nick were no different. Nick experienced a knee injury, and Justin (like a good brother) started looking for ways to help his recovery process.

Some of Justin’s Crossfit friends recommended bone broth to speed joint and ligament healing, and so the quest began. As the brothers learned more about the gelatin, amino acids, and minerals that make bone broth so great, they also realized they wanted a shortcut option that didn’t take hours to make at home.

There didn’t seem to be much available. Shelf-stable bone broth wasn’t simmered in the way it is in your kitchen, didn’t gel, contained additives and preservatives, and often didn’t come from grass-fed organic sources.

Through trial and error Justin and Nick pursued their dream of a better bone broth, and Kettle & Fire, the first shelf-stable, long-simmered commercial bone broth from only organic grass-fed sources, was born.

In This Episode, You’ll Learn

  • the unique nutritional and amino acid profile of bone broth
  • what each amino acid does for health
  • reasons why your bone broth defies you and doesn’t gel (yes, you’re not alone!)
  • what scientific studies do (and don’t) show about the benefits of broth
  • the role of glycine and methionine in the body
  • why the type of bones used to make bone broth matter
  • how to get the most out of your bone broth
  • why Kettle & Fire is so different from other commercially produced broth
  • some downsides to other commercial broth brands (we try to be gentle … kind of)
  • how to customize homemade broth and use it more ways than you ever thought possible

Resources We Mention

Thanks to Today’s Podcast Sponsors

This podcast episode is brought to you by Perfect Supplements. If your family struggles with the taste of certain foods like liver or kale, Perfect Supplements might be your answer. Their concentrated superfood capsules and supplements give you all of the benefits without cooking something no one will eat.

Our family uses Perfect Supplements’ desiccated liver capsules (from 100% grass fed cattle). I can see why Tim Ferriss and Dave Asprey recommend this product! We also use Perfect Supplements collagen, greens powder, and fermented kale.

Perfect Supplements is USA made, incredibly reasonably priced, and super selective in purity and sourcing. You can get 10% off of any order by going to PerfectSupplements.com/wellnessmama and using the coupon code WELLNESSMAMA10. They always offer bulk discounts too, which is a real budget saver in my family!

This episode is also sponsored by The Wellness Mama Cookbook. I came up with these recipes for my own family, so they’re quick, easy, packed with veggies and fruits, and definitely kid-approved. They’re also mom-approved, and here’s why.

Like all of you, I’m a busy mom. I made sure the majority of the Wellness Mama Cookbook recipes can be made in under 30 minutes and many of them only one pan (who wants to wash dishes?). All of my 200+ grain-free recipes replace processed sugar and flour with nutrient-dense foods and vegetables kids love!

You can check out the cookbook at any major bookstore or on Amazon. I’d love to hear what you think!


Continue Reading...70: All Bone Broth Is Not Created Equal with Justin Mares of Kettle & Fire


source https://wellnessmama.com/podcast/kettlefire-bone-broth/?utm_source=rss&utm_medium=rss&utm_campaign=kettlefire-bone-broth

Friday 3 March 2017

How to Use a Konjac Sponge (and Why It’s Worth Trying)

How to Use a Konjac Sponge -and Why It's Worth Trying

Ever heard of a konjac sponge? It’s true … the same konjac root that makes miracle noodles also makes a fabulous facial treatment! Thank goodness you don’t need to rub pasta on your face to get the nourishing benefits of konjac.

The increasingly popular konjac sponge can help naturally cleanse, exfoliate, and nourish skin. Here’s why it has enjoyed its recent rise in popularity:

What Is a Konjac Sponge?

So maybe you’ve seen the little colored round sponges but weren’t quite sure what to make of them. Konjac sponges are made from the dried and ground root of the konjac, or elephant yam, that’s native to Asia.

Asian cultures have used konjac root for over 2,000 years, and konjac sponges have been a popular item there for about 100 years.

The process is simple enough. Konjac powder is mixed with calcium hydroxide, heated, frozen and then dried. The calcium yields an alkaline end product that helps to balance an overly acidic skin pH. Sometimes powdered charcoal or green or red clay is added to benefit different skin types and further draw out skin impurities.

Why a Konjac Sponge Works

I’m a big fan of body brushing for its ability to increase circulation, exfoliate and cleanse pores. A konjac sponge is like body brushing for your face. It’s also helpful for dry patches, acne, blackheads and eczema.

Konjac naturally nourishes with vitamins A, B, C, D and E, proteins, lipids, fatty acids, copper, zinc, iron, and magnesium. This wonder veggie even has antioxidants and has historically been used to suppress tumors. Unlike other exfoliators that harm the environment, konjac is completely natural, non-toxic, and biodegradable (no harmful plastic microbeads needed!)

Better yet, the konjac sponge has enough innate cleansing properties on its own that some people have success using it with just water. Research shows that konjac even inhibits the bacteria that produce acne.

Which Color to Choose

You may notice that there are different colored sponges, but it’s not just for show.

Be sure to check with the manufacturer to see if their colored konjac sponges contain any artificial colors or other undesirable ingredients. When in doubt, even just the simple white konjac sponges work well to improve skin health.

What a Konjac Sponge Feels Like

Konjac sponges feel finer than washcloths, and they’re softer than loofahs and many other face exfoliators. A water barrier forms over the surface of the sponge which makes it feel very slick (almost slimy), but in a good way.

The texture is a little similar to the typical white makeup sponges.

How to Use a Konjac Sponge

  1. When you first get a konjac sponge you’ll notice it’s small and rather hard. Soak the sponge in warm water for 15 minutes before the first use. Once you’ve used it, it will only need soaking for a minute or two before it softens and expands to about one and a half times its size.
  2. Gently squeeze the excess water out by pressing the konjac sponge between your palms. Don’t be rough with it. Apply a small amount of cleanser (if desired), or just use the sponge plain.
  3. Rub the konjac sponge on the face in upward, circular motions. Concentrate on dry or blackhead-prone areas. It’s a mild exfoliator, so it may feel like you need to scrub hard to get it to work, but that isn’t necessary. These sponges will remove dirt, sunscreen, and even makeup. (You may need to use a little bit of coconut oil to remove heavy eye makeup though.)
  4. Rinse the konjac sponge well with cool water and gently squeeze the excess water out by pressing the sponge between your palms. Don’t twist, wring, or pull on it.
  5. Hang it to dry, or put it on a rack so there’s airflow. Alternately, you can keep the sponge in a sealed container in your fridge. Make sure to store it away from light and humidity. Right next to your steamy shower isn’t the best option.

Taking Care of a Konjac Sponge

Every 2 weeks, place your konjac sponge in very hot (but not boiling) water for about 5 minutes to disinfect it.

After 4-6 weeks, pitch the sponge and get a new one. It’s time to replace the sponge when it no longer expands properly and starts to disintegrate.

What is your favorite way to cleanse your skin? Have you every tried a konjac sponge and if so, what did you think? Please share in the comments!

Reasons to try washing your face with a konjac sponge-natural cleanser made from a root

Sources:

F. H. Al-Gazzewi and R. F. Tester, “Effect of konjac glucomannan hydrolysates and probiotics on the growth of the skin bacterium Propionibacterium acnes in vitro,” International Journal of Cosmetic Science 32, issue 2 (October 2009).
Melinda Chua. et al., “Traditional uses and potential health benefits of Amorphophallus konjac K. Koch ex N.E.Br.,” Journal of Ethnopharmacology 128, issue 2 (March 2010).
http://www.refinery29.com/2014/01/59896/konjac-sponge

Continue Reading...How to Use a Konjac Sponge (and Why It’s Worth Trying)


source https://wellnessmama.com/147952/konjac-sponge/?utm_source=rss&utm_medium=rss&utm_campaign=konjac-sponge

Thursday 2 March 2017

7 Natural DIY Makeup Remover Recipes for Happy Skin

natural makeup remover recipes

natural makeup remover recipes

If we’re going to go through the trouble of applying natural DIY makeup, it makes sense to have a natural way to remove it.

After battling acne-prone skin when I was younger, I’ve made it a priority to take good care of my skin. I’ve found some great natural solutions for healthy, glowing skin through experimentation over the years, and below I’ll give you my best DIY makeup remover tips.

Why Makeup at All?

Let’s be honest, just because you’re a “Wellness Mama” doesn’t mean you don’t like to feel pretty.

From taking a soothing lavender bath, to lathering up with a homemade whipped body butter, to applying makeup, I’ve learned it pays off to go out of my way to take care of myself in simple, natural, inexpensive ways. With six little ones underfoot, it makes a big difference to do these little things for myself.

So while I feel just fine on the days I don’t wear makeup (which are many), I appreciate having a few beauty tricks up my sleeve … while avoiding the harsh chemicals found in conventional products.

Best DIY Makeup Remover Solutions

There are several great options for removing makeup naturally, and these are also great skincare recipes even on no makeup days.

1. Oil Cleansing

Oil cleansing is just what it sounds like: cleaning your face with oil. This DIY makeup remover may be the simplest of all.

It sounds funny, but oil cleansing can actually dissolve excess oil in your pores. Using the right oils, you can balance overly dry or overly oily skin because oil cleansing can work for any skin type!

Popular oils to use for oil cleansing include castor and olive oil, but with some experimentation, you may find that other oils work well for your skin. Sunflower, safflower, avocado, and coconut oils may work as well. Personally, I’ve found a ratio of 3/4 olive oil to 1/4 castor or hazelnut oil is perfect for my skin.

Try one of the following recipes to decide which oils are right for your skin:

  • Oily Skin: 1/3 castor oil or hazelnut oil to 2/3 olive, sunflower, or other oil
  • Combination Skin: 1/4 castor or hazelnut Oil and 3/4 olive, sunflower, or other oil
  • Dry Skin: All nourishing oils like olive oil, or a very small amount of castor/hazelnut oil added to the nourishing oils.

To use the oil cleansing method as a DIY makeup remover:

  1. Use about a quarter-sized amount of oil and massage over your face for one to two minutes. (No need to pre-wash or wet your skin.)
  2. Soak a clean washcloth in very hot water and wring it out before placing it over your face. Allow it to sit and steam your face for about a minute.
  3. Give your skin a wipe with the clean side of the cloth and allow the thin layer of oil left behind to remain and soak into your skin.

I found that I had an adjustment period of about 3-4 weeks while my skin detoxed, during which I had increased breakouts. After my skin adjusted, it cleared right up and has looked great since!

2. Witch Hazel

If you want to step up your oil cleansing a notch, you can try adding witch hazel.

Made from the witch hazel shrub, witch hazel is basically an herbal extract or hydrosol. It has been used traditionally for skin problems and has a long history of use in the beauty industry.

I love witch hazel as a multi-purpose remedy because it helps with a variety of skin conditions. It helps with spot-treating acne, soothing dry skin or itching, and removing makeup.

To use witch hazel as a DIY makeup remover:

  1. Use witch hazel on its own or diluted 50:50 with water.
  2. Soak the corner of a washcloth or cotton makeup pad and remove makeup in circular motions.

3. Aloe Vera

Combine aloe vera gel with a couple of skin-nourishing ingredients to whisk away makeup and impurities.

To use aloe vera as a DIY makeup remover:

  1. In a small container, combine equal parts aloe vera gel and raw honey.
  2. Add 2 TBSP of your oil of choice for every 1 cup of cleanser.
  3. Use an immersion blender to combine the ingredients until a paste forms. Store in an airtight container, and be sure to keep your cleanser in the refrigerator if it contains fresh, preservative-free aloe vera.
  4. Use a small scoop of the cleanser to remove makeup by massaging it into the skin for one to two minutes before rinsing clean with cool water.

4. DIY Makeup Remover Wipes

I’ve told you about the dangers of conventional baby wipes and why I make my own. Conventional, store-bought makeup removing wipes pose the same problems: chemical preservatives and other hormone disrupting, unnatural ingredients.

Making your own makeup remover wipes is easy though!

To make DIY makeup remover wipes:

You’ll need:

  • a pint-sized jar with a tight-fitting lid
  • cotton rounds
  • 1 Tablespoons of pure aloe vera
  • 3 teaspoons pure witch hazel extract
  • 1 teaspoon liquid castile soap (Dr. Bronner’s Baby Mild is a perfect choice.)
  • 1 teaspoon fractionated coconut oil (or your favorite skin-cleansing oil)
  • 8-12 drops skin-soothing essential oil like lavender or frankincense
  • optional: 1 tsp vitamin E oil or 6-8 drops rosemary essential oil as a preservative.

To make:

  1. Combine everything but the cotton rounds in the jar and shake or use an immersion blender to combine well.
  2. Stack the cotton rounds in the jar, then gently shake it to coat them with the mixture.
  3. Use a cotton round to wipe your makeup off anytime you need a quick DIY makeup remover. The cleansing wipes are great for traveling!

5. Honey Face Wash

Naturally antibacterial honey fights acne and contains enzymes that help slough away dead skin cells.

To use honey to clean off your makeup:

  1. Simply use about a teaspoon of raw honey (I like either Manuka Honey or Raw Organic Honey) and rub between your hands.
  2. Spread it over your face and massage in a circular motion.
  3. Allow the honey to sit for 5-10 minutes before removing with a warm cloth. Once your skin dries, it will be fresh and dewy!

6. Exfoliating Scrub

I’ve always loved the feeling of a good scrub to exfoliate my skin and get rid of dead cells and microscopic dirt in order to get a glowing complexion.

Ground walnut shell makes a great exfoliating ingredient, and there are some great natural products that contain it. However, if you want to go even more natural, plus save money by making your own DIY makeup remover scrub, you can try this recipe:

To make:

  1. Combine walnut shells and castille soap in a small bowl; stir and set aside.
  2. Over low heat, combine the calendula oil with the emulsifying wax in a small pot or double boiler and warm until the wax has melted.
  3. In a separate pot, gently warm the aloe vera gel for a minute or two, then add it to the oil mixture and whisk to create an emulsion.
  4. Add the emulsion to the walnut shell mixture, along with the essential oil.
  5. Stir once more to combine well and store in an air-tight jar.
  6. Massage about a 1/2 teaspoon over skin to cleanse, then rinse with warm water.

Caution: As this is a scrub, avoid the eyes and use one of the other makeup remover recipes for eye makeup.

7. Rose Water Cleansing Gel

I don’t know if there’s anything that smells more lovely or feminine than rose water. I make it for all sorts of things, including perfume, flavoring foods, uplifting my mood, and, of course, my beauty routine.

To make a DIY makeup remover with rose water, combine the following ingredients in a pump bottle:

  • 1 cup rose water (see how to make it here)
  • 1/4 cup aloe vera gel
  • 2 tsp glycerine
  • 1 tsp castille soap
  • 8 drops rose absolute for additional scent and skincare benefits
  1. Pump a squirt of this cleanser into clean hands or on a clean washcloth and massage over your face in a circular motion until clean.
  2. Rinse with warm water and pat dry.

Demystify Safe, Natural Skin Care!

Going the DIY route with your skin care routine doesn’t have to be scary or hard, and with all of the above options, you’re sure to find a solution that works for your skin type.

Which DIY makeup remover are you excited to try first?

Continue Reading...7 Natural DIY Makeup Remover Recipes for Happy Skin


source https://wellnessmama.com/140134/diy-makeup-remover/?utm_source=rss&utm_medium=rss&utm_campaign=diy-makeup-remover

How to Choose a Good Greens Powder

How to choose a good greens powder

How to choose a good greens powder

You can’t out-supplement a poor diet (or sleep and stress levels). But even with a perfect diet, it is still possible to experience nutrient deficiencies because modern foods can be deficient in certain essential nutrients. To ensure that we get enough of these, I personally use and recommend a whole food source multivitamin like in a greens superfood powder.

What is a Greens Superfood Powder?

In shorts, a green superfood powder is many servings of vegetables and superfoods in a scoop of water-soluble powder. In addition to veggies and superfoods, the powder may also contain other health-supporting ingredients like probiotics and immune-supporting herbs.

Why Greens Supplement?

An ancestral and whole-foods diet may be a significant step up from the Standard American Diet that has a lot of grains, vegetable oil, and processed ingredients. However, there are many reasons even the seemingly healthy diet alone might still not provide enough micronutrients and antioxidants.

Our Soil is Depleted from Minerals and Good Bacteria

Over the last 100 years, industrial farming has depleted the most nutritious topsoil from important minerals and beneficial soil bacteria that would grow the healthiest foods. As a result, the vegetables in our food supplies also have less mineral density. The reduction of minerals in our foods, as well as the fertilizers and pesticides, may be a contributor to diseases of civilization.

Reduced Food Diversity and Wild Varieties

On Chris Kresser’s podcast, Dr. Thomas Cowan MD said that healthy hunter-gatherer humans ate a much wider variety of vegetables than we do today, up to 20 species per day and 100 species throughout the year. The supermarket vegetables we normally eat have been bred to have more uniform shapes and sizes, with higher sugar content and less bitterness, which also means less micronutrients and phytonutrients than the wild vegetables.

Reduced Nutrient Density in Vegetables

These vegetables may have been harvested weeks and traveled thousands of miles before they reach your table.

Modern Lifestyle Depletes Vitamins and Minerals

The modern lifestyle, with chronic stressors and pollutions all around us, increases our needs for micronutrients. We need more B vitamins and magnesium to deal with stress. We also need more B vitamins, selenium, and antioxidants to remove the chemicals that we are exposed to.

In the Proceedings of the National Academy of Sciences, the world leading nutrition researcher Dr. Bruce Ames wrote that low micronutrient status can lead to metabolic disruption, mitochondrial decay, cellular aging, and increased DNA mutation (source).

These can lead to fatigue, hormone imbalances, poor immune function, weight gain, and increased risks of cancer and neurodegenerative diseases. Therefore, supplementation with a multivitamin and mineral is a recommended as a cost-effective way to prevent nutrient deficiencies.

Greens Powder vs Vitamins

As a general rule, it is better to get your micronutrients from whole foods than from synthetic or isolated vitamins. First, nutrients that are present together in whole food sources often work in synergy, like vitamin C and bioflavonoids in fruits or vitamins A and D in egg yolks, cod liver oil and butter. Second, micronutrients in whole foods are generally more bioavailable than the synthetic forms. Third, there are still important nutrients and phytochemicals in plants that we have yet to discover.

Because a greens supplement provides vitamins from nutrient-dense whole food sources, it is a great way to ensure that you get sufficient amounts of micronutrients and antioxidants. The soil may be depleted from minerals, but the sea is not. Therefore, you want to get a greens supplement that includes some marine sources of nutrients.

Most vitamins, especially B vitamins, are stimulants. Many people find B vitamins so stimulating that it causes heart palpitations and anxiety. Whereas, vitamins from whole food sources, with the natural nutrient forms and synergies, are less likely to cause this problem. You may have eaten foods high in B vitamins like vegetables or liver without the heart palpitations. Since it’s also a whole food, greens powder can help with fatigue and hormone balance without the excess stimulation.

Problems with (Most) Green Powder Products on the Market

There are a LOT of greens powders out there, but not all are created equal.

Most Greens Powders Taste Terrible

Vegetables, especially the more nutrient-dense ones, are good for you. Unfortunately, it’s hard to make vegetables taste good, especially when you try to condense as many as 12 servings of vegetable into a single scoop.

In order to make the green powders taste palatable, several manufacturers may use potentially harmful ingredients, such as:

  • Artificial sweeteners
  • Sugar
  • Emulsifiers or thickeners to maintain texture for mouthfeel
  • Artificial Colors
  • Non-organic or GMO ingredients

The Processing May Destroy Beneficial Nutrients and Antioxidants

Creating a greens superfood powder is technologically difficult because many vitamins and phytochemicals are very sensitive to heat, light, and certain forms of chemical?processing. The vegetables in the greens powder have to be gently freeze-dried into water-soluble powders in order to preserve the nutrients. Whereas, in order to make use of single-celled algae, the manufacturer may need to harshly crack the cell walls of these algae to make nutrients inside the cells available.

Therefore, you want to make sure that you purchase the greens powder from a reputable company that understands the biology of the superfoods they include in their products and confirm the presence of intact nutrients in the final products.

The Greens Powder that I use

My favorite greens supplement that I and my family take is Spring of Life Daily energy. I like the product because it is easy to mix and tastes great. Just a single scoop of it provides the antioxidant equivalent of 12 servings of fresh fruits and vegetables from 75 different species of plants. I can trust that it is gluten-free, GMO-free and free of allergens or harmful ingredients.

The Pros

  • Well-researched ingredients for nutrient synergy and diversity
  • Contains both land and marine sources of nutrients, which ensures the presence of microminerals that are lacking from the soil
  • Contains active forms of B vitamins and methyl donors, such as methyl folate and methylcobalamin, which means that it is a good supplement for people with methylation problems
  • Includes non-dairy probiotics and prebiotics
  • Contains digestive and systemic enzymes which can support digestive health and help reduce inflammation
  • Contains herbs that support the immune system, detoxification and the adrenals

The Cons

People with specific health concerns may react to certain ingredients in green superfoods powder, including:

  • Allergies and food sensitivities to the ingredients may warrant some bad reactions
  • Those with small intestine bacterial overgrowth may react badly to the probiotics and inulin in the green powder.
  • Several herbs in the greens powder stimulate the Th1 immune system (astragalus, shitake and reishi mushrooms), while others stimulate the Th2 immune system (green tea, grapeseed extract, gotu kola). Therefore, this product may be contraindicated for people with autoimmune diseases, especially during a flare.

This is the greens powder I use daily: Spring of Life Daily Energy.

What’s your experience with green superfood powder supplements? Please?share in the comments!

How to choose a good green superfood powder

Continue Reading...How to Choose a Good Greens Powder


source https://wellnessmama.com/124151/greens-powder/?utm_source=rss&utm_medium=rss&utm_campaign=greens-powder