
Wednesday 31 August 2016
6 Natural Teething Remedies for Baby (That Really Help!)

At more than one point in time I have had as many as three children teething in my home. The older children are able to understand what is going on but the baby just doesn’t understand why there is an aching pain in his mouth.
It seems to happen the same way every time. After several days (sometimes weeks) of the baby being irritable and fussy, I noticed a red bulge in baby’s mouth and have the ah-ha moment. Teething, of course! Now all the fussiness and whining makes perfect sense.
Natural Teething Remedies
Teething is hard work and unfortunately it is something we all must go through. Thankfully, most of us don’t remember the pain! But what can you do to help your little one through this milestone?
I’ve found the following teething remedies to work well and give some much needed relief for our children.
1. Cold
Applying something cold to help numb the gums is very effective and soothing for teething pain. There are several easy and virtually free ways to do this with things you probably already have in your home.
- Partially freeze a clean, wet cloth. Let your little one chew on the cold cloth to help numb the area and reduce swelling.
- Some children experience a lack of appetite when they are teething. It may help to offer soft, cool foods such as homemade applesauce, chilled pieces of fruit (for older babies already eating solids), and homemade yogurt.
- Offer your baby an ice cube placed in a securely tied small muslin bag.
- I am not a fan of mesh baby feeders because they are very difficult to clean, but there are silicone ones available now and they are handy for teething babies. You can put partially frozen fruit (bananas work well) or even breastmilk ice cubes in them to give baby something cold to safely munch on.
2. Apply Pressure
It is often easy to tell when a baby starts teething because they really begin to chew everything, quite similar to a puppy. The counter-pressure seems to help soothe the pain. They chew on fingers, toys, furniture (here is a great tutorial for protecting crib railings), and even siblings!
There is no shortage of options for colorful, soft baby teething toys, but there are certainly some that I would never want my baby to chew on. However, I have found some that I am comfortable with and that are still fun and cute.
- The most convenient teething tool out there is your own clean hand. If you can stand the gnawing, offer your baby your clean knuckle and he will happily chew away. You might think twice however, if your little one already has teeth. Those little chompers are mighty powerful!
- Make your own! I bought a maple wooden ring made in the U.S.A. (like this one) and cut several strips of organic knit cotton. The knit doesn’t fray very much so I didn’t even finish the edges. Cut 3 or 4 strips (about 2″ x 10″) and knot each end. Loop it through the ring, fold the strip in half, and tie 2 or 3 over hand knots so that it leaves little tails. Here is a cute one if you don’t want to make it.
- Haba Toys are made to much stricter European safety standards and offer a colorful array of toys for children and babies.
- My daughter loves these soft silicone teething toys. They are easy for her to hold but also are shaped in a way that allows her to reach her back gums.
- No teething toy list would be complete without Sophie the Giraffe. This natural rubber teething toy is irresistible to babies and mommies alike. In fact, it has gained enormous popularity in recent years. Made with natural rubber and food grade paint so it is safe for teething (though the colors do fade over time).
3. Teething Jewelry
Wear a teether! A friend of mine gave me a silicone teething necklace after I had my last baby and I really like it because it is so handy, doesn’t fall on the ground, and it distracts the baby from pulling at my earrings. She also really loves to chew on the soft beads and they are surprisingly cute to wear.
4. Chamomile
Chamomile is naturally calming and helps relax nerves and soothe pain. I am never without chamomile in my home. There are several ways you can use chamomile to soothe teething pain.
- Tea – make a weak tea and freeze it in ice cube trays. Place a frozen tea cube in a muslin bag and secure it tightly. Now your baby can gnaw on the bag and benefit from the chamomile as the cube melts.
- Tincture – this is quite easy to make yourself and you can place a drop or two on your finger and rub it onto your baby’s gums to soothe teething pain.
- Essential Oil – I am very cautious when using essential oils, especially on children, but when they are used correctly and at the proper dilution, essential oils can be a very helpful home remedy. Mix 1 drop of chamomile essential oil into 1 tablespoon of a carrier oil (such as coconut or olive). Rub a small amount on baby’s gums to help relieve pain.
5. Amber Teething Necklace
Amber necklaces have gained a lot of popularity in recent years. The theory is that the warmth of the baby’s body releases the succinic acid found in Baltic amber. Succinic acid can have analgesic properties which help relieve pain in the body. It is difficult to prove one way or another whether these necklaces are effective but there are many, many testimonials and reviews sharing success stories.
It goes without saying that extreme care should be taken when anything is placed around a baby’s neck and they should be removed for sleeping. I personally use an amber necklace for our daughter but it may not be successful for all babies.
6. Topical Pain Relief
- Homeopathic remedies like Hyland’s Teething Tablets can provide great relief for sore gums. They are readily available in most stores and the active ingredients are safe and natural. At one time there was a recall but the product was reformulated (out of an abundance of caution). You can read about the recall here.
- For children over the age of 2 you can use clove essential oil. Clove oil has a numbing effect on the gums that studies have shown to work as well as benzocaine. (insert link) Mix 1 drop of clove oil with 1 tablespoon of a carrier oil (coconut or olive) and rub on the gums a few times a day. This would be helpful for adults with tooth pain as well, just increase the clove oil.
Cutting teeth can be a rough time for both mom (and dad!) and baby, but with a few natural teething remedies like these, it can be much easier and less painful to get through.
Have you tried any of these teething remedies? What remedies have you found to be helpful for teething babies?
Continue Reading...6 Natural Teething Remedies for Baby (That Really Help!)
source http://wellnessmama.com/127126/natural-teething-remedies/?utm_source=rss&utm_medium=rss&utm_campaign=natural-teething-remedies
Monday 29 August 2016
Disgusting Dust Mites: Everything You (Didn’t) Want To Know

It only took a little research into finding a new mattress to learn more than I ever wanted to know about dust mites. Little critters related to ticks and spiders that live in your pillow, mattress, and furniture? Ugh!
I mean, do you really want thousands of those cringe-worthy little pests in the picture above in your pillow at night? Not me!
Sometimes ignorance really is bliss. But as much as we’d like to pretend dust mites don’t exist, their presence can really impact the health and happiness of our homes if we are prone to allergies.
Want to know how to control dust mites and the symptoms they cause? Then read on!
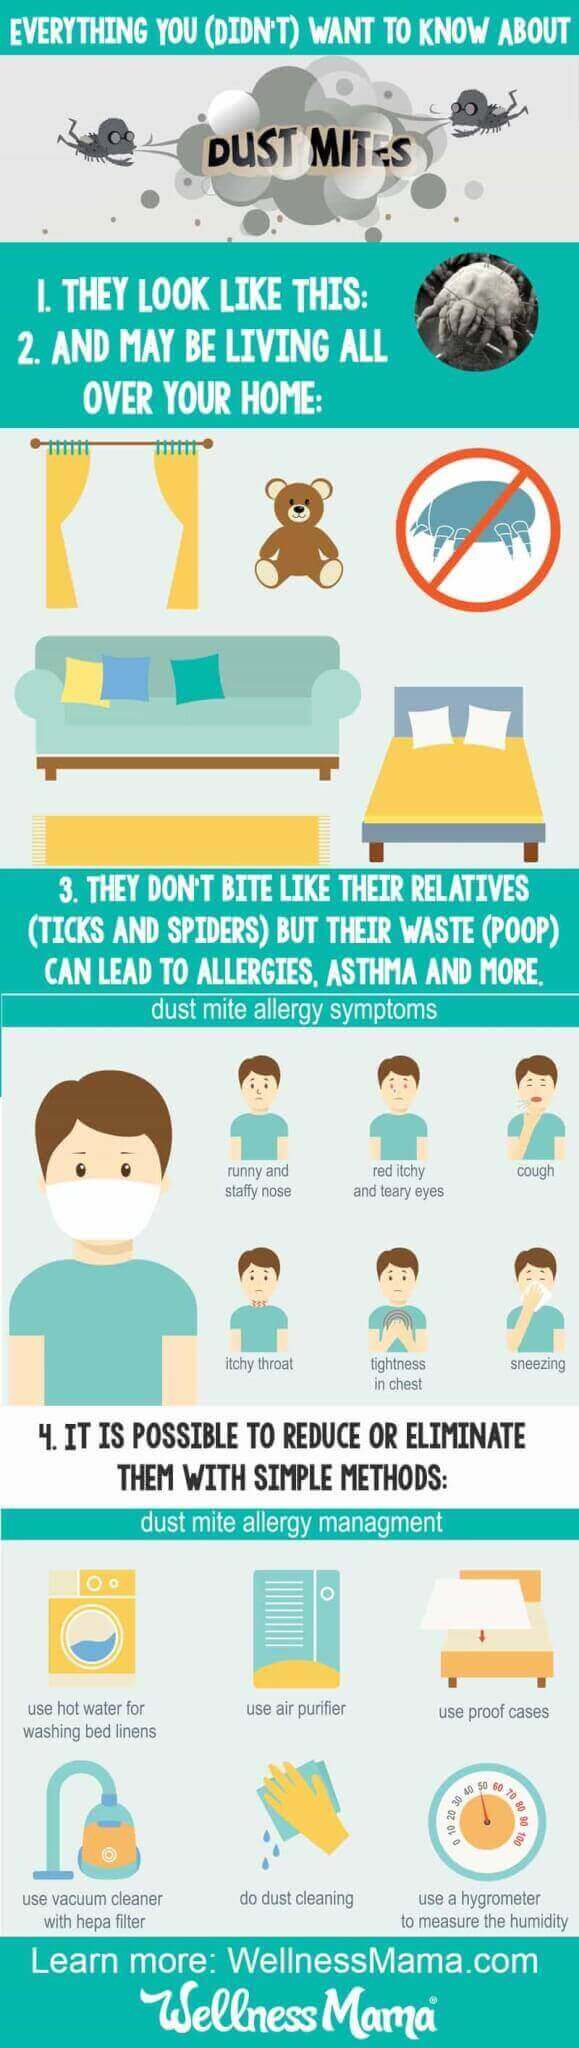
What Are Dust Mites Anyway?
Dust mites are microscopic eight-legged bugs related to ticks and spiders. They live in our homes and feed on the dead skin cells we shed every day. Basically, they eat our dust.
Since dust mites extract their water from the air, they prefer warm and humid places close to their food source. This makes the places we sit, lie down, exhale, and perspire prime real estate for them. Mattresses, couches, and carpets are dust mite magnets.
What’s more, dust mites replicate very quickly. A female dust mite lays over 100 eggs a month in her short 2-3 month life span. In the right conditions you can have a serious dust mite problem in very little time.
Here are some facts you may (or may not!) want to know:
- A used mattress can have between 100,000 and 10 million mites inside.
- A square yard of carpet contains about 100,000 mites.
- One study found an average of 16 types of fungi (a dust mite food) on pillows.
- The particles you might see floating in the air are mostly made up of skin flakes.
Are you grossed out yet? I sure am!
Do Dust Mites Bite?
Although gross, the good news is dust mites do not bite, carry diseases, or draw blood like some of their relatives. And since we can’t see them, most of the time we are blissfully unaware of their presence.
So other than being a creepy thought, why are dust mites a problem?
You might not like the answer!
The real threat is what dust mites leave behind… their waste. There’s a lot of it in fact. A single dust mite can lay over 20 droppings a day. And those droppings are chock full of allergens to the human immune system.
As if we needed one more reason not to have them around!
Am I Allergic to Dust Mites?
The short answer is probably, but it may not be serious.
If anyone in your family has symptoms of congestion, coughing, or watery eyes especially when sleeping or indoors, you may want to consider dust mites as one source of your problems.
Or, if anyone in your family has gastrointestinal issues, you’ll want to pay attention to dust mites.
Most urgently- if anyone in your family has asthma, COPD, or a respiratory issue of any kind, dust mites are a very serious issue for you and you’ll want to take every step you can to control them.
Dust Mite Feces: The Real Problem
Dust mite feces (their poop) contain powerful digestive enzymes that actually allow the resourceful dust mite to eat and gain energy from its own waste.
But for humans, these enzymes can be destructive. In fact there are over 20 allergens in a single dust mite waste packet, which can easily enter the human bloodstream when disturbed and sent airborne.
In 1997 scientists identified the mechanisms by which this digestive enzyme could work its way into the body. Once on the surface of the lungs, Der p1 (the most studied and understood enzyme) attacks and dissolves the ‘glue’ that holds the cells together. If significant, this breach of lung defences, combined with spillage from undigested contents of the mite’s gut, can raise an alarm in the body’s immune system which may lead to a ‘full-blown’ allergic reactions. Following the discovery of the activity of Der p1, doctors soon found that it actually travels within the body and is capable of reaching the fluid surrounding unborn children. (1)
In fact, studies show that dust mites and the allergic reactions they provoke are a root cause of asthma in children and can actually cause lung cell death. Prolonged exposure to dust mite allergens can also lead to eczema, gut disease, conjunctivitis, hay fever, and ear problems. (3)
How To Get Rid of Dust Mites
I’m guessing at this point you’re eager to get rid of the dust mites in your home, but unfortunately they can hook themselves firmly into your couch or mattress. Vacuuming does very little to dislodge any of them. (Although you still should vacuum carpet, furniture, and even mattresses to remove their food source, dust.)
If you’re not allergic to dust mites you may not need to do much about them. But there’s no doubt that decreasing your dust mite exposure could prevent a future allergic problem from developing, and it’s always a good idea to take steps to reduce toxins from dust in your home.
There are chemical procedures to reduce dust mites, but of course I’ll list only natural methods of attack here!
Protect Your Mattresses and Bedding
Perhaps the most important step you can take in the war against dust mites is to encase your new mattress or pillow right away in a dust mite blocking mattress cover. (The material is woven so tightly anything over 5 microns can’t get through, or get out.)
Here is an option that doesn’t use plastic membranes.
The initial cost will be worth it to guarantee you can use your mattress without allergy problems and rest easy for a long time to come.
Change and Wash Your Bedding Often
A hot wash and a hot dryer is the best defense. Wash pillows, sheets, blankets, comforters, and mattress pads often. Can’t wash it? Put it in the freezer for a night.
Dust First, Dust Often
Dust before you vacuum so any loose dust will be captured by your vacuum’s HEPA filter. Always use a wet cloth rather than dry dusting.
Here’s a particularly charming description I guarantee will motivate you the next time you don’t feel like dusting:
CONSTITUENTS OF HOUSE DUST
cigarette ash, incinerator ash, fibers (wool, cotton, paper and silk), fingernail filings, food crumbs, glass particles, glue, graphite, animal and human hair, insect fragments, paint chips, plant parts, pollen, polymer foam particles, salt and sugar crystals, human skin scales, animal dander, soil, fungal spores, tobacco, wood shavings. (4)
I’m resisting the urge to stop writing and dust right now!
Use a HEPA Filter Vacuum
While my favorite vacuum for quick use unfortunately doesn’t have a HEPA (High Efficiency Particle Air) filter, I definitely recommend one if you suffer from allergies.
Keep in mind carpet is a dust mite haven no matter how good your vacuum is. Consider replacing carpet with hardwood which is easier to keep dust free and is inhospitable to mites.
Run a Home Air Filter
Back up your allergen fighting efforts by running an air filter in your home to remove dust particles before they settle. I really like this one.
Air Out Your Bed
While my husband hates it when I don’t make our bed right away, there are some researchers who say it is healthier to leave your bed unmade during the day (I often cling to the hope that I’ll be able to climb back in if the kids decide to take a nap!)
Something as simple as leaving a bed unmade during the day can remove moisture from the sheets and mattress so the mites will dehydrate and eventually die. – Dr. Stephen Pretlove, BBC News, 2005 (2)
Use a Dehumidifier
Decrease your indoor humidity to below 50% when possible using dehumidifier. When using a humidifier in the winter, keep it at 35-45% humidity. This will help dehydrate the mites and kill them off.
Keep It Cool
Keeping your thermostat below 70 degrees Fahrenheit will decrease dust mites. Keeping your windows closed in the summer also reduces pollen in your home, a dust mite food. I recommend this step only if you have an allergy to dust mites, as indoor air contains more pollution and toxins than outdoor air.
Do you struggle with indoor allergies? Do you think dust mites could be the cause? Please share any remedies that have helped you and your family!
Sources:
(1) http://housedustmite.com/introduction-to-the-dust-mite
(2) http://www.today.com/home/scientists-keep-mites-away-leave-your-bed-unmade-every-day-t43496
(3) http://housedustmite.com/associated-diseases/
(4) http://lancaster.unl.edu/pest/resources/311dusmi.pdf
Continue Reading...Disgusting Dust Mites: Everything You (Didn’t) Want To Know
source http://wellnessmama.com/127087/dust-mites/?utm_source=rss&utm_medium=rss&utm_campaign=dust-mites
Wednesday 24 August 2016
Tuesday 23 August 2016
The Crazy Reason to Cut Down Your Bradford Pear Tree

When I started blogging many years ago and began chronicling my experiences making homemade deodorant and other sundries, I never thought I’d write a passionate post about why you should immediately cut down any Bradford Pear trees… but here we are.
Cut Down the Bradford Pear Tree?
I know that is a strong statement:
Go cut down any Bradford Pear Trees you have right now and never plant another one!
But why? They are so pretty with their gorgeous white flowers. Sure, they smell something fierce when they bloom, but they are so pretty!
You know what else is pretty? Dingo puppies:

and Mountain Laurel flowers:

But both of those can kill you. Those cute little wild puppies will bite your throat when they grow up. Those delicate little flowers can drop your blood pressure low enough to kill you.
Just being pretty doesn’t mean something is good or beneficial and while the harmless-looking Bradford Pear Tree may not bite your throat like a Dingo or lower your blood pressure dangerously like the Mountain Laurel, it is certainly problematic in its own way. In fact, they’ve even been called an environmental disaster.
Here’s why:
Where Did Bradford Pear Trees Come From?
To understand why these trees are a problem, you have to understand where they came from.
The Bradford Pear Tree originated in China and were introduced in 1964 by the US Department of Agriculture as an ornamental tree. This flowering tree was assumed to be sterile (spoiler alert- it isn’t!) and was known for its weak branch structure. They have a lifespan of only 20-25 years, as anyone who has seen these trees in an ice storm can attest.
Now, normally, if you wanted to plant a weak and sterile tree in your yard, that wouldn’t bother me at all… so why do I hate the Bradford Pear so much? (and why am I even bothering to write about this tree in the first place?)
Here’s why:
Why Bradford Pears are Dangerous?
It turns out, they aren’t sterile as it was assumed.
Sure, they don’t pollinate among themselves, but these promiscuous and stinky little trees like to pollinate with EVERYTHING else out there.
This leads to some major environmental problems:
Because of the cross pollination problem, pear trees have now proliferated exponentially across our environment. And, to make matters worse, the evil offspring has reverted to the ancient Chinese Callery pears which form impenetrable thorny thickets that choke the life out of pines, dogwoods, maples, redbuds, oaks, hickories, etc.
When you see those fields of white flowering trees, please don’t get giddy with excitement over pretty white flowers. What you are looking at are Callery pears destroying nature. Callery pears have 4 inch thorns. They can’t be mowed down. Those thorns will shred John Deere tractor tires. They can only be removed by steel tracked dozers, decreasing the value of agricultural or forest land to the tune of $3,000 per acre. (source)
Did You Catch That?
They may not be hurting your yard, but they are causing major damage for farmers and choking out beautiful (and valuable) hardwood trees. Which is why I’m writing about this topic today. In fact, all reputable nurseries know about the problems with these trees. Good landscapers refuse to plant them.
I’ve been on hikes and encountered these Callery pears and their 4-inch thorns myself and they aren’t nice.
Those pretty little white trees in your yard are cross pollinating and causing these problems all over.
We brought these trees over thinking they wouldn’t reproduce and now they are doing just that and taking over native species. We tampered with nature and like the Kudzu taking over the South or the Burmese Pythons taking over the Everglades and eating alligators, we created a big problem.
Let’s try to fix this one. Cut them down… now!
Other Problems with Breadford Pears
Not only are these trees causing serious damage to native plants and shredding tractor tires, but they come with other problems as well.
Structurally weak:
Bradford Pear trees are structurally weak. Many people love them because they are perfectly symmetrical and grow in a beautiful shape. They even maintain this gorgeous shape for about 2 months until rain, snow or even a mild breeze causes them to break in half.
Seriously… they have a lifespan of only about 20 years and will usually die as a result of ice, snow or even rain making their branches too heavy.
We’ve all seen these trees cracked in half after a storm. Why plant a tree that will just be a mess to clean in the yard in a few years?
Prevent grass from growing:
Grass has trouble growing underneath Bradford Pear trees and often the area under these trees is bare and muddy.
Get too big:
These were supposed to be small, ornamental trees that only grow 25 feet tall and equally wide. Unfortunately, no one informed the trees themselves, as they sometimes get twice as big and overtake the small yards they are planted in.
And they stink:
As an irrelevant side note, they also smell really, really bad. Their smell has been compared to various foul smells including rotting fish (as well as a couple other smells I’ll avoid listing for the sake of any younger readers). Do you really want that in your yard?
Does the Bradford Pear Tree Produce Fruit?
Now, all of those negatives could potentially be less of a problem if the tree at least did something beneficial, like produce fruit that you could eat.
But it doesn’t.
It was originally created to be sterile and so produces no fruit. Instead, it cross pollinates with other species and creates all kinds of problems.
How to Cut Them Down
I’ve seen anti-Bradford Pear campaigns (PDF) from various cities around the country encouraging people to cut these trees down. Some cities, like Pittsburgh, have gone so far as to ban them completely.
If you are considering planting trees in your yard, please choose other options. If you already have some of these in your yard, consider cutting them down and replacing with something less harmful.
Unfortunately, this won’t be the easiest tree to eliminate. Cutting it down is the first step, but getting rid of it completely requires some extra effort. Now is a great time of year to do this before they bloom in the spring and Fall is a great time to plant new trees.
Here’s What to Do
- Cut down the tree.
- Grind out the root.
- Prepare for battle: These trees don’t give up easily and they will send out hundreds of suckers, or shoots, from the roots for up to two years after you cut it down until the roots finally give up and die.
- During this time, you can do things like: drill holes in the root and pack salt into it (this will help a little).
- Mow often so the sprouts can’t get big or go to seed.
- If grass isn’t growing anyway, consider covering with black plastic to choke out the roots and then re-seeding once the roots are gone.
- Replace the stinky Bradford Pear tree with a beneficial and equally beautiful tree (suggestions below).
Alternatives to the Bradford Pear Tree
Thankfully, these are dozens of better alternatives that you can plant in your yard. Choose alternatives based on your needs:
- Shade: Plant bigger trees that will create shade as they grow. Maples and Oaks are good options.
- Flowers: Try Redbuds, Serviceberry or Carolina Silverbell.
- Looks: Consider Japanese Maples or Peggy Clark Maples.
- Food: Or, plant a tree that actually produces something useful, like an apple, peach, or cherry tree.
Your yard and our native species of plants will thank you!
Do you have any of these trees? Did you know about the terrible effects of them?
Continue Reading...The Crazy Reason to Cut Down Your Bradford Pear Tree
source http://wellnessmama.com/126975/cut-down-bradford-pear-tree/?utm_source=rss&utm_medium=rss&utm_campaign=cut-down-bradford-pear-tree
Monday 22 August 2016
My Top 5 Resources that Make Homeschooling Easier

I’ve mentioned in passing several times in webinars and videos that I learned to speed read in middle school and that it is, to this day, one of the most valuable things I’ve learned.
Then, no matter what the topic of the video or webinar was, as soon as I ask if anyone has questions, the one I get the most without fail is:
That’s nice, but HOW DO I LEARN HOW TO SPEED READ?
Now that I have kids approaching middle school age and I’ve been teaching them, I figured I should share the way that I learned, as well as some tools that make learning easier.
My Top Homeschooling Resources
We are just getting back into the swing of school for the year and I’ve been using several online tools that my kids love and that are making my life easier. Most of them are free, and I’m sharing them today.
Even if you don’t homeschool, these tools may help make school easier for your kids and speed up the learning (and homework) process.
If you don’t have kids, these tools are still great for learning speed reading and other new skills.
1. How to Learn Speed Reading
This is one of the top skills I’m working with my kids on because it makes all of the other skills so much easier. The best part is that really anyone can learn it. I have a photographic memory and learned this a little differently, so I was having trouble teaching my kids until I found a computer program that makes it super simple.
The program is called Spreeder, and it has un-teaches bad reading habits and retrains you to read quickly and efficiently. There is a free app version that only works online, but I’d highly recommend the inexpensive premium version that allows you to speed read practically anything. We have the paid version and it has already been well worth it.
Spreeder also allows you to copy and paste many formats of text into it and be given it to speed read. You can put ebooks, articles and even blog posts you’ve been meaning to read in there and be able to read them at 300 wmp+ when you are just starting out!
My kids love this because it is on the computer and seems like a game to them. They can even somewhat “compete” on how many wpm they can read.
Check out Spreeder here and learn how the system works.
2. Online Piano Teacher
Our favorite piano teacher retired earlier this year, and I’ve been struggling to find another local teacher. A friend told me about Hoffman Academy that teaches the basics of piano online for free. I was skeptical but have been really impressed with how easy it was to follow along and learn. (I might not have quit piano myself as a kid if I had this instead of a grumpy teacher who hit my knuckles when I messed up!)
Fair warning- my kids love this and our house is a constant chorus of the Star Wars theme song and “Tomorrow” from Annie right now but they are really enjoying it. As much as I do love their beautiful music *ahem*, we just got a keyboard with headphones for them to practice on when the baby is napping and the piano is too loud.
3. Easiest Way to Learn a Language
In school, when given the chance to learn languages, I picked Greek and Latin. As you may imagine, this was certainly helpful on the SAT, but hasn’t been quite so useful in daily life.
I picked up some Spanish myself and from traveling, but I’ve been having a blast learning Spanish and French alongside my kids. Lately, we’ve been using a free online tool called DuoLingo that makes learning languages a game. They are retaining what they learn much more than when it was just bookwork, and the program really is fun.
The best part:
It has an app for phones and tablets as well. When we are out and about, I can let them do a lesson on my phone in the car or at the dentist office.
4. Full Online Homeschool Curriculum Options
As someone who carried a 40+ pound backpack to high school, it still amazes me that there are literally entire courses and curriculum online. I’ve looked through a lot of them and found a few that were really high quality and that we use in some way.
Some are free, though my favorite ones are not. Still, they are much less expensive than private school and I really like using them as a supplement.
Ron Paul Curriculum
This tool isn’t free, but it has been a life-saver for me this year and is really inexpensive compared to other programs I’ve seen online. The Ron Paul Curriculum has online classes for all of the core subjects including reading, math and history. We use it as a supplement to our regular curriculum, and the kids especially like the history curriculum.
I love it because it doesn’t require any textbooks or extra materials. The courses are taught by college professors via video lectures and I am really enjoying watching them and learning too. They also focus quite a bit on writing and have students write weekly essays starting in 4th grade. I’m a tad bit biased, but writing has been an incredible useful skill for me and I’m happy to see my kids learning solid writing skills too!
The curriculum also focuses on critical thinking and uses original sources whenever possible.
Khan Academy
Khan Academy is another great all-in-one homeschool curriculum online. We use several of the courses supplementally. Their math programs are very interactive and my kids especially love the coding and computer animation classes right now. They offer advanced classes all the way up to calculus and even test prep for all major tests. Did I mention it is free?
Academic Earth
Mainly for older kids, Academic Earth offers advanced classes from many collages for free. You don’t get the college credit for the classes, but if you are just interested in the information, it is an incredible way to learn. If you’ve heard of the free classes from Harvard and MIT available online, this is where to find them.
5. How to Learn to Code
In an increasingly technological world, computer science skills are extremely marketable. In fact, I know of several high school students who learned to code and who are saving for college or to start a business by doing freelance coding work. Though I have a rough understanding of code after all of the years of blogging, I certainly don’t know enough to teach it.
We use Codecademy for online instruction on how to code. It is easy to understand and interactive. Any student who is able to read can start learning many different coding languages on this site.
Do you homeschool or use online tools to help your kids with school work or homework? Share your best tips below!
Continue Reading...My Top 5 Resources that Make Homeschooling Easier
source http://wellnessmama.com/126933/homeschool-resources/?utm_source=rss&utm_medium=rss&utm_campaign=homeschool-resources
Saturday 20 August 2016
How to Make Recycled Wine Bottle Tiki Torches

Ever since I was little, I’ve loved unique glass jars and bottles. I remember asking my mom if I could save old jars and bottles and I would make crafts with them or use them to store little toys.
Now, as an adult, I avoid plastic as much as possible and we use glass, stainless or wood in its place. I love that when making tinctures and natural remedies, I can save and reuse glass jars.
My natural remedies cabinet looks like a vintage apothecary with a collection of unique and recycled jars and bottles.
How to Upcycle Wine Bottles Into Tiki Torches
In recent years, it has gotten more difficult for my hubby and I to get away for date nights, so our go-to date is to drink a glass of wine on the patio after the kids go to bed. This has left us with quite a few beautiful wine bottles over the years.
The one downside to our patio wine-drinking dates this summer has been the clouds of mosquitos who like to join us.
Thanks to the magic of Pinterest, I’ve come up with some great ways to upcycle and reuse old wine bottles and my favorite is making these DIY wine bottle tiki torches.
Why Tiki Torches:
Where we live, this summer has (not so) affectionately come to be known as the mosquitopocalype because of the literal clouds of mosquitos. We’ve been using my homemade bug spray aplenty but when swimming, it is hard to keep enough bug spray on to avoid the mosquitos.
I started looking for some tiki torches to use in our yard but the only options at our local store were:
- Really nice metal tiki torches that cost over $20 each
- Cheaper bamboo ones that our puppy would likely confuse with his bone and chew on the first day
I started researching how to make tiki torches by reusing glass wine bottles and found a simple all-in-one option. We have quite a few of these in our yard now and they help with the mosquitos and look great too
Wine Bottle Tiki Torch Cautions
As with any DIY involving glass or fire, it is important to use caution when making and using these. Glass can break if it isn’t taken care of properly. Since this uses citronella oil, it can also be a fire hazard if used incorrectly. Of course, use common sense with these and make sure to:
- Use these only in areas where they can’t be knocked down or easily break. Or, use the kind with mounting brackets so they can be safely held in place. This is the kit I used to mount my tiki torches.
- Consider putting small rocks or marbles in the bottom of the bottle to add extra weight and prevent tipping if using on a table.
- Don’t use these indoors.
- Keep the wick on the top of the bottle at 1 inch or less.
- Store the torches in a garage or shed (or somewhere else away from the weather) when not in use.
- Again, use common sense.
Wine Bottle Tiki Torch Supplies
To make these tiki torches, you’ll need several very specific supplies:
- Wine, beer or liqour bottle with a standard size neck- (I recommend OZV or Dry Farms Wine)
- 1/2 by 3/8 copper coupling
- 10 inch tiki wick
- Nylon thread seal tape or 1/2 inch rubber washers
- OR an all-in-one tiki torch kit
- Tiki Torch Fuel*
*Most tiki torch fuels are petroleum based and create harmful byproducts when burned. I like this safe and green formula that is natural, sustainable and burns cleanly.
Wine Bottle Tiki Torch Kits
I also found a great kit that includes all of the supplies to make a tiki torch lamp. This kit is to make a mounted version that mounts to a fence, post or other surface. This kit includes the couplings and wicks to make 3 torches.
How to Make The Wine Bottle Tiki Torches
- Wrap one side of the coupling with the nylon tape or slide the rubber washers onto it. This helps hold the coupling in place and seal off the fuel from the air. You’ll want to make sure that the coupling can slide into the mouth of the bottle tightly but not fall in. For wider bottles more nylon tape or thicker washers may be needed.
- Feed the wick into the coupling, laeving about 1/4 to 1/2 inch above the coupling to be able to light.
- Optional step: Add clean rocks or marbles to the bottom of the bottle to fill it 1/3 full. This is optional and only recommended for tiki torches that will be on a table and not those hanging or mounted.
- Add tiki torch fuel to fill the bottle to the beginning of the neck. TIP: According to some sources, you can add a few inches of water first and then the fuel. The fuel floats on top of the water and this reduces the amount of fuel needed and makes it more efficient since the fuel doesn’t have to travel so far up the wick.
- Carefully insert the coupling into the mouth of the bottle.
- Let the wick absorb the fuel for at least half an hour before lighting.
- Light and enjoy.
Other Ways to Reuse Wine Bottles
- Plant Watering: Drill a small hole in the top of a screw-on top wine bottle. Fill with water and return the cap with the drilled hole. Turn upside down and bury the neck of the bottle 4-5 inches in the dirt of a potted plant.
- Vase: Wrap an empty wine bottle in twine and use as a vase for simple flower arragements.
- Dish Soap Dispenser: Add a pour-top to an old wine bottle to make a dish soap dispenser or to store any other liquid ingredients.
What are your favorite at-home date ideas? How do you reuse old bottles?

Continue Reading...How to Make Recycled Wine Bottle Tiki Torches
source http://wellnessmama.com/126941/wine-bottle-tiki-torches/?utm_source=rss&utm_medium=rss&utm_campaign=wine-bottle-tiki-torches
Friday 19 August 2016
How to Save 3.5 Hours A Week (by Meal Planning)


Short answer? Meal Planning (here’s how).
Here’s the long answer and the way I save 3.5 hours a week with 5-minutes of meal planning…
I’ve always been a systems person who likes to find the fastest way to accomplish something. I’m also a (recovering) perfectionist.
Unfortunately, this led to some sleepless nights in high school and college as I stayed up all night studying or making sure a report was perfect, but over time, I’ve learned to harness my perfectionism and love of systems to actually save time rather than take time.
Some people call it mildly obsessive compulsive, I call it good time management.
The One System That Changed My Life
Whatever you call it, there is one particular system that has literally changed my life as a mom and that is meal planning. It is something I started doing almost a decade ago when I was pregnant with my first child and have done it (mostly regularly) ever since. In fact, of all the systems and planning, planning out meals for the week has saved me the most time (even more so than speed reading).
I started meal planning out of sheer necessity when we had an incredibly limited budget and I had to be sure that no food went to waste. I’ve continued doing it over the years both to save money and to save time.
At first, I made and used a basic index-card system which worked well, but took about half an hour each week to organize and plan, plus the 2+ hours of shopping each week.
It evolved into a spreadsheet and exported PDF documents that I could view on my phone which worked a little better.
Eventually, I developed a whole online system that would store my recipes, generate meal plans and allow me to customize based on family size. I began sharing this with a few readers several years ago and Wellness Mama Meals was born.
I’ve tracked the time I spent planning, preparing and shopping for meals on weeks that I didn’t meal plan ahead and weeks that I did… the difference? 3.5 hours a week on average. (I also saved about $45 a week shopping when I planned vs. when I didn’t).
Unfortunately, while Wellness Mama Meals was perfect for me, it had its limitations for you. For instance, I could add recipes since I had backend access to the system, but users could not add their own. I had a list of requests from users for improvements, such as the ability to exclude recipes with ingredients they were allergic to and better mobile usability or an app. These things were well beyond my technical ability or what I could afford to hire someone to create.
A Better Way to Meal Plan?
After attending a health conference last year, I ended up sitting next to someone at a restaurant and the topic of meal planning came up. It turns out that he was the husband of a blogger I love and have become friends with (Emily from Holistic Squid), and I realized that he shared my enthusiasm for real food and for systems.
In fact, this guy (Antony Bartlett) was a systems ninja. And he had created a meal planner. And it was better than mine. A LOT BETTER.
At first, I had an internal conflict. On the one hand, I loved my recipes and the meal planning system I’d spent years developing, but on the other hand, I knew I could never create as good of a system as he had.
Eventually, I had a long conversation with Antony and Emily and made the decision to merge Wellness Mama Meals into Real Plans. I expected that it would be easier for users and that current users would love it (they do), but I was surprised to find out how much more I loved it too! In fact, even with creating many of my own recipes each week (because food blogger…) it is still saving me hours of time!
Real Plans is so easy to use and customize that I can literally meal plan in about 5 minutes a week. It creates a meal plan automatically, which I can customize as much as I’d like and then I can view the plan, recipes and shopping list on my phone.
Seriously, I’ve been meal planning for almost a decade, and Real Plans is saving me even more time, especially at the grocery store and farmers market. Since there are also options for batch cooking or a prepare ahead day, it is even easier to save time!
Another bonus? With Wellness Mama on Real Plans, you get all 500+ of my recipes, plus over 1,000 additional recipes with new recipes being added each week!
Click Here to Test out Real Plans!
A Look Inside
Real Plans automatically generates a meal plan for you each week. You can choose in the settings to have them email it to you or just login and check it… This also works on their free mobile app so you can plan, shop and cook from your phone!

Don’t like something on the menu? No worries, you can customize with a drag and drop feature in about three seconds:

Have allergies or foods your family won’t eat? Just add them on the settings page and you’ll never see recipes with those ingredients again! You can also customize how many people you are cooking for.

You can even customize what days you want to generate meals for, what type of meals, and even if you want a big cooking day so you can batch-prepare meals ahead of time.

If you have family favorite recipes, you can add those and make them part of your meal plan.

And after you finish that incredibly long process (which might take a whole 5 minutes if you change everything 😉 ) Real Plans generates a custom shopping list that you can view on your phone via their mobile app while you shop. You can even check off items you already know you have so you only buy exactly what you need.

It’s so easy!
On top of that, you can modify each recipe, define what store you want to purchase each ingredient at, and even add a photo of the specific ingredient (in case you send your husband to the store to pick up ingredients and he doesn’t know which brand to get).
I can honestly say that few things have truly changed my life. Among them are homemade deodorant, magnesium, my organic mattress and Real Plans. Of those, Real Plans is the least-expensive and most valuable (as little as $7/month!)
Click Here to Test out Real Plans!
Meal Plan From Your Phone
Another advantage to Real Plans is the ability to plan and shop entirely with your phone. You can view the meal plan, recipes or shopping list from your phone and check off the list as you shop:


More Reasons I Love (and Use) Real Plans Each Week
- The easiest way to plan healthy meals for my family
- Mobile app for easy use, especially when shopping
- I easily save more per week than Real Plans costs per month!
- It takes under five minutes to plan our meals for the entire week
- Reduces my grocery shopping time and budget by simplifying the process
- Makes it effortless to stick to meal planning
- My children love using it and my 9-year-old can plan meals for our whole week by himself
Meal Plans Each Week Include
- A pre-made meal plan based on your food preferences
- Ability to completely change and customize the meal plan each week
- Easy to add your own recipes or recipes from your favorite website(s)
- All of my recipes (500+), plus over 1,000 new recipes and more added each week
- Simple way to sort by ingredient, remove recipes with allergens and modify any recipe
- So much more!
As you can probably tell, I’m super excited about Real Plans and I think you’ll love it too!
Do you meal plan? If not, what is stopping you?
Continue Reading...How to Save 3.5 Hours A Week (by Meal Planning)
source http://wellnessmama.com/4290/wellness-mama-meals-real-plans/?utm_source=rss&utm_medium=rss&utm_campaign=wellness-mama-meals-real-plans
Wednesday 17 August 2016
Benefits of Beeswax [Plus, 12 Creative Ways to Use It]


Imagine for a second a scenario in which you were simultaneously:
- caring for a newborn that needed constant care
- building a house with your own hands
- having to fight off people trying to break into your home
- still responsible for normal cooking and cleaning
Stressful- right? Yet this is what a honey bee colony does every single day. On top of that, every single thing they produce is beneficial in some way!
Why Bees Are Amazing
Ever seen the inside of a honey bee hive? It’s incredible.
Everything is completely ordered, clean and functioning at all times. I sometimes have trouble taking care of one baby at a time, and honey bees take care of hundreds, while building a house.
As a former beekeeper and now watching my son take care of his bee hive, I’m in constant amazement of how awesome bees are.
Honey, Honey
Honey may be the most popular product bees create, but it is far from the only beneficial one. (But try using honey on your face if you haven’t already).
The word apitherapy refers to the practice of using bee products like honey, bee pollen, royal jelly, beeswax in beneficial ways. Even honey bee venom has been used therapeutically! Sound crazy? Check out this video from the Discovery Channel that explains it.
Now, before I ramble on for hours about how cool bees are (and I really could ramble for hours about it!), I want to focus on one specific product bees make and the many uses it has….
The Brilliance of Beeswax:
Bees actually make beeswax and then form it into the structure of the hive. They secrete wax from special glands, then chew it up and use it to form perfect hexagon shaped honey comb.
Ever tried to even draw a perfect hexagon? It’s tough even with a ruler, and bees do it with mathematical precision.
Honeybees have also apparently been on board with The Life Changing Magic of Tidying Up since the beginning. Their hexagon shaped honeycombs offer the most storage space with the least amount of building material (in this case, beeswax).
When beekeepers harvest honey, they remove the cap off of each hexagon shaped cell in order to extract the honey. These cappings are melted down and filtered to remove non-wax particles which yields the beeswax we use in the many DIY recipes.
Beeswax is one of the 7 ingredients I buy in bulk and always keep on hand for a good many of my natural recipes and remedies. It has dozens of uses around the home.
Benefits Of Beeswax
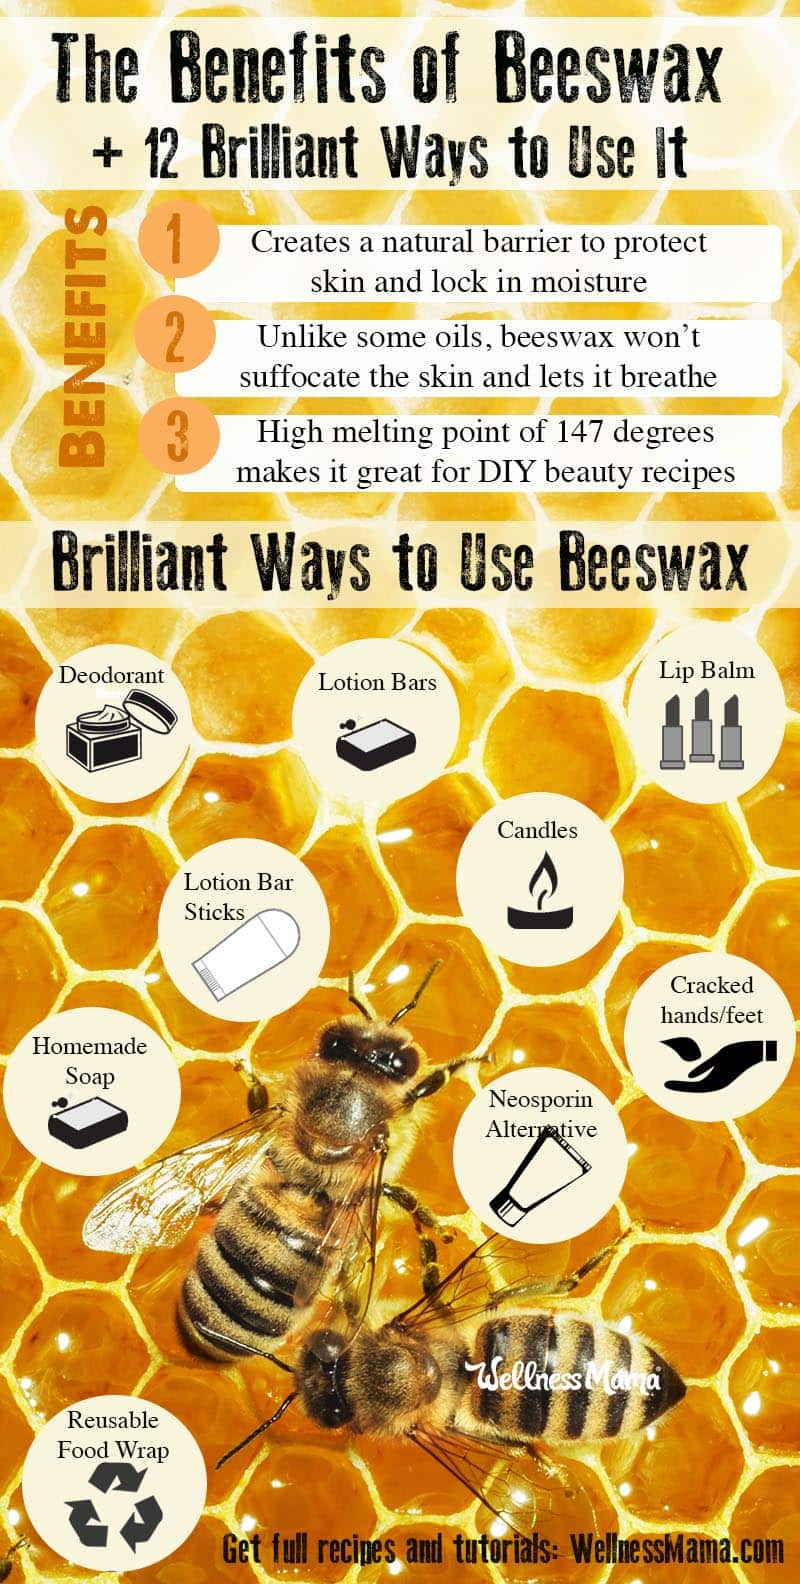
Beeswax is an excellent addition to cosmetic products, for many reasons.
- When used in lotions and creams, beeswax creates a barrier which helps to seal moisture into the skin. This is especially beneficial in lip chap during the dry winter months.
- This barrier also helps to protect the skin from environmental toxins and irritants.
- Unlike petroleum jelly, which is used in a large variety of beauty products, beeswax will not “suffocate” the skin, but rather, allow it to breathe while still providing a protective barrier.
- Beeswax helps to thicken homemade cosmetics and lotions because it is solid at room temperature and has a relatively high melting point of 147 degrees Fahrenheit. This is especially helpful in recipes that include high amounts of coconut oil, which has a low melting point, or other oils that are liquid at room temperature.
- Beeswax also has Vitamin A, which improves hydration to the skin and promotes cell regeneration.
Brilliant Uses for Beeswax
Beeswax is an incredible versatile natural ingredient for natural beauty and natural home products. It is a staple in my homemade beauty products and around our house.
If you haven’t already, try beeswax in these awesome ways:
1. Homemade Deodorant
I’ve been making my own deodorant for years because it works so much better than store bought. One of the ingredients I use is beeswax because it helps form a natural protective moisture barrier. This means it helps avoid sweat stains on clothes without the need for harmful and unnecessary chemicals. Here’s my favorite DIY deodorant recipe.
2. Lotion Bars
I’m biased, but these are the best moisturizer in the world. A perfect combination of oils, shea butter and beeswax forms a solid soap-like bar that is used on dry skin. It helps soothe skin, locks in moisture and even has natural anti-wrinkle properties. Make your own with this simple tutorial.
3. DIY Lip Balms
You can make dozens of homemade beauty products with the same set of simple ingredients. This lip balm recipe uses the same ingredients as the lotion bars but with a couple of added ingredients for scent or color. Once you have these basic ingredients on hand, you can make lip balm for pennies a tube (instead of the $2-3 in stores!). My favorite is this imitation Burt’s Bees Lip Balm.
4. Lotion Bar Sticks
Like the lotion bars above, this recipe uses beeswax, oils and shea or cocoa butter. This recipe is a modified version that allows it to be used in a deodorant container. This makes it a little easier to store and apply than the traditional lotion bar. Recipe here.
5. Beeswax Candles
I ditched the scented candles and air fresheners years ago. We only use beeswax candles in our home and they are easy and fun to make yourself. They also make great homemade gifts for the important people in your life. Try this tutorial to make your own!
6. Homemade Soaps
Beeswax is often added to soap recipes to make the finished soap harder and last longer. It should only account for up to 2% of your soap recipe. Any more than that and your soap will begin to lose lather. Try this spiced essential oil soap. My husband loves it!
7. Baby Products
Most babies will have a diaper rash at some point. I make an effort to only use natural skin care products but with the new, sensitive skin of a baby I take extra care to make sure all ingredients are natural and safe. I use beeswax in diaper rash cream as a thickener and because it provides a protective barrier for the skin while helping the other beneficial ingredients stay on the skin so they can have a greater effect on clearing up the rash.
8. Soothe Cracked Heels
A simple salve of beeswax, coconut oil and magnesium makes a great remedy for cracked heels. Here’s how to make it.
9. Or Cracked Hands
I really believe that almost everything we need to remedy minor ailments are found in nature. Plantain grows in most yards and is a natural remedy for bites and stings and even sunburn. Beeswax is a great remedy for cracked hands from gardening or outdoor work. It also creates a protective barrier to help avoid future damage.
I like to add in beneficial herbs from the garden to speed relief even more. Grab the recipe here.
10. Natural Neosporin Alternative
I keep this “boo-boo lotion” on hand to treats scrapes, stings, poison ivy, bruises, and for whatever other sort of mild injury my kids manage to get. It works almost as well as kisses for relief of minor boo-boos.
11. Cold and Flu Relief
When any illness strikes, I turn to beeswax based natural remedies. Homemade natural vapor rub helps when coughing and congestion hit, this vapor rub can help to provide some relief without slathering petroleum jelly all over your skin.
Frequent nose blowing during illness can wreak havoc on the tender skin around your nose. This sore nose soothing balm recipe combines herb-infused oil with beeswax and shea butter for a healing, nourishing balm.
12. Reusable Food Wraps
DIY Reusable Food Wraps – Heather from Mommypotamus has a great tutorial on how to make your own reusable food wraps. These have a “cling” that makes them a wonderful alternative to plastic wrap.
Where To Buy Beeswax
I like to buy beeswax pastilles because they are incredibly easy to work with when you need smaller amounts for lip chap and salves. You can also buy it in block form which is slightly less expensive than the pastilles. Having pastilles isn’t necessary when you are doing larger projects like candles because you can measure by weight, rather than by the tablespoon. With a recent surge in popularity, it is even available on Amazon in many forms now.
Another option is to buy it locally if you are able to get in touch with beekeepers in your area. This helps support local beekeepers and you can often find it relatively inexpensively.
How do you use beeswax?
Continue Reading...Benefits of Beeswax [Plus, 12 Creative Ways to Use It]
source http://wellnessmama.com/124235/beeswax-uses-benefits/?utm_source=rss&utm_medium=rss&utm_campaign=beeswax-uses-benefits
Monday 15 August 2016
Friday 12 August 2016
Why Drink Limu?
A popular question that gets asked is “should I drink Limu?” The answer is really simple in that it depends on what you’re looking for. The following are some of the reasons that people drink Limu. You just might find that one or several of these reasons work for you too!
Limu Original – Health and Flavor
 You may have seen pictures of this bottle all over the place. It is probably the most popular product sold by The Limu Company. Limu Original is usually mixed in with water and taken periodically by people who are interested in preserving their health or even enhancing it. It is rich in something called “fucoidan” which has been speculated to have many amazing benefits. Without getting into too much technical stuff, fucoidan is something you get from seaweed and it is sought out by people all around the world because of the supposed health benefits that it might have.
In addition to health, Limu Original has a really great taste! You’ll probably notice the organic papaya or even the mango taste. It’s really amazing! It’s made with natural flavors and it’s vegan, kosher and gluten free too. These are just some of the great benefits of Limu original. You can check out the products page for more info!
Limu Lean – Lose Weight
 As the name implies, Limu Lean is a product that people from all over are taking to lose weight. At the time that this is being written, it is the only weight loss and meal replacement system that also has fucoidan. It’s endorsed by Olympic gold medalist, Rowdy Gaines too!
Unfortunately there isn’t a huge variety of flavors available for Limu Lean at this time. But if you’re interested in losing weight, this might be a good product for you to try out. The entire package is extremely convenient in that you can also have Limu Burn which is sort of like a “shake on the go”. It’s packaged and ready for you to consume right away in case you happen to be in a rush.
So if you’re overweight and asking yourself “should I drink limu?” the answer is might just be yes. Just make sure to take a look at the product for yourself and make that decision on your own.
Blu Frog Energy Drink
 Are you already drinking energy drinks? Monster and Red Bull are terrible for you! Even the stuff from Starbucks is pretty bad. However Blu Frog is an energy drink that is made with some Limu Original. In my opinion it’s way better than anything else you can get on the market. It always leaves me feeling great after I drink it and I don’t crash after having one.
I would have to say that Blu Frog is probably my favorite limu product. It’s also gluten free and vegan! Check out the Blu Frog page for more info on the benefits, reviews and ingredients.
So, Why Drink Limu?
In the end you’re just going to have to come up with your own conclusion based on the facts, reviews and information that you’ve acquired through our site and the many websites out there. I drink limu because it makes me feel great, it’s clean, it tastes awesome, and it seems to be so much better than any other products available.
If you’re still not sure about limu and you need more information, you can find out what limu is here. This is an article written to help people who are unfamiliar with limu get a basic understanding.
Thanks for checking in to our blog and be sure to share!
The post Why Drink Limu? appeared first on Limu Juice.
source http://www.limujuice.net/why-drink-limu/
source http://limujuice.blogspot.com/2016/08/why-drink-limu.html
The Benefits of Kombucha


There are many benefits attributed to Kombucha – an age-old fermented tea drink that has been around (in various forms) for centuries in many different cultures.
What is Kombucha?
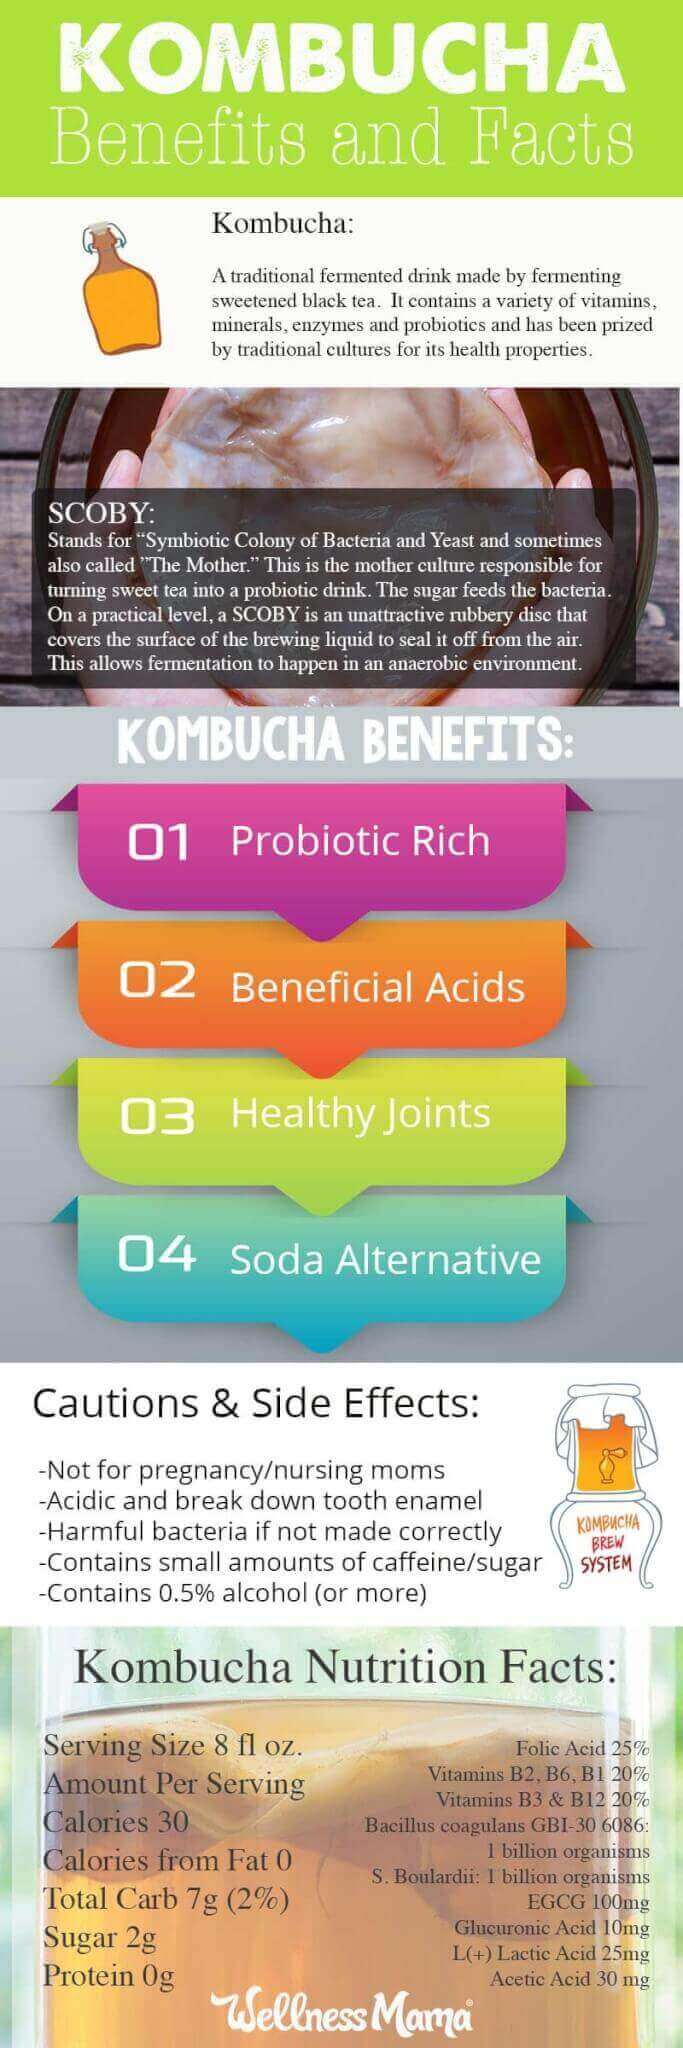
Kombucha is a traditional fermented drink made of black tea and sugar. It contains a variety of vitamins, minerals and enzymes and has been prized by traditional cultures for its health-promoting properties.
More specifically, Kombucha is a sweetened tea that is fermented with a SCOBY (a symbiotic colony of bacteria and yeast) to become a nutrient-rich beverage. The fermentation process takes 7-12 days depending on temperature and the strength of the SCOBY. The SCOBY consumes over 90% of the sugar during fermentation, resulting in a low-sugar finished product. This process is similar to what would happen in sourdough bread or milk/water kefir.
Once obscure, Kombucha is now a popular beverage that is available at most health food stores and grocery stores. Many people also brew at home using various methods including the batch method and continuous brew.
The SCOBY: Colony of Microbes
The SCOBY, or Symbiotic Colony of Bacteria and Yeast, is the collection of microbes responsible for turning sweet tea into a probiotic beverage. Essentially, it is a living colony of beneficial organisms that turn sugar into healthful acids and probiotics.
SCOBYs are often called “Mushrooms” and are the reason Kombucha is sometimes called “Mushroom Tea.” On a practical level, a SCOBY is an unattractive rubbery disc that covers the surface of the brewing liquid to seal it off from the air. This allows fermentation to happen in an anaerobic (air free) environment.
You may also hear a SCOBY called “The Mother” as it is the parent culture that creates the tea. During the brewing process, the SCOBY also often creates a “baby” or secondary culture on top of itself, which can then be used to brew other batches.
If properly taken care of, a SCOBY can last for many years. In fact, I know a couple of families that have generations-old strains of SCOBYs that have made babies over the years.

Kombucha Nutrition
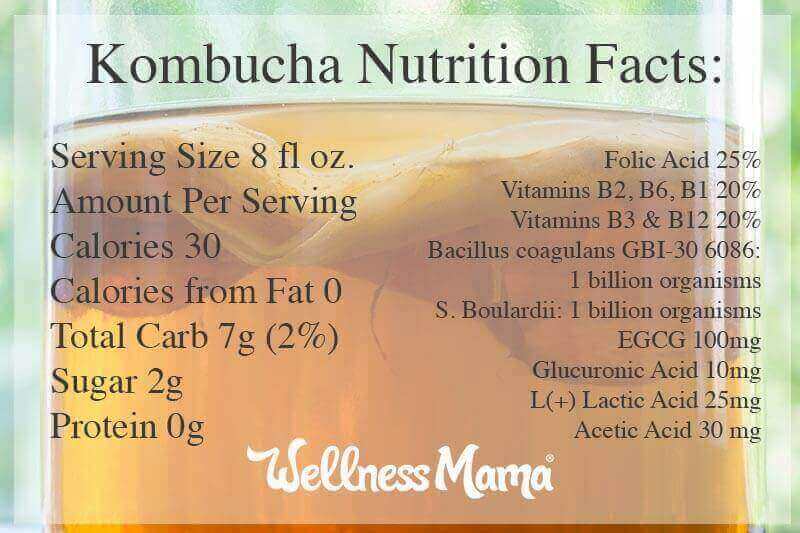
As mentioned, this tangy fermented beverage contains beneficial probiotics and acids. It is lower-calorie than other carbonated beverages like soft drinks, with only about 30 calories per cup (8 ounces). Kombucha is fat free and does not contain any protein.
One cup does contain about seven grams of carbohydrates and about 20% of the daily value of B-Vitamins, according to the label of the popular GT brand. Eight ounces also provides:
- Bacillus coagulans GBI-30 6086: 1 billion organisms
- S. Boulardii: 1 billion organisms
- EGCG 100mg
- Glucuronic Acid 10mg
- L(+) Lactic Acid 25mg
- Acetic Acid 30 mg
What Does it Taste Like?
This fermented tea has a slightly sweet and slightly tangy flavor, reminiscent of a shrub or vinegar based drink. The flavor varies widely by brand and homebrew method. Finished kombucha tea can also be flavored in a process called secondary fermentation by adding juices, fruit or herbs.
Kombucha Benefits and Probiotics
This ancient health tonic is attributed with several health benefits. The nutrients in contains are wonderful at supporting the body in various ways. It is important to note that while there is an abundance of anecdotal evidence from avid supporters, studies about kombucha are lacking. But then again, so are studies about flossing, but everyone seems to be pro-flossing.
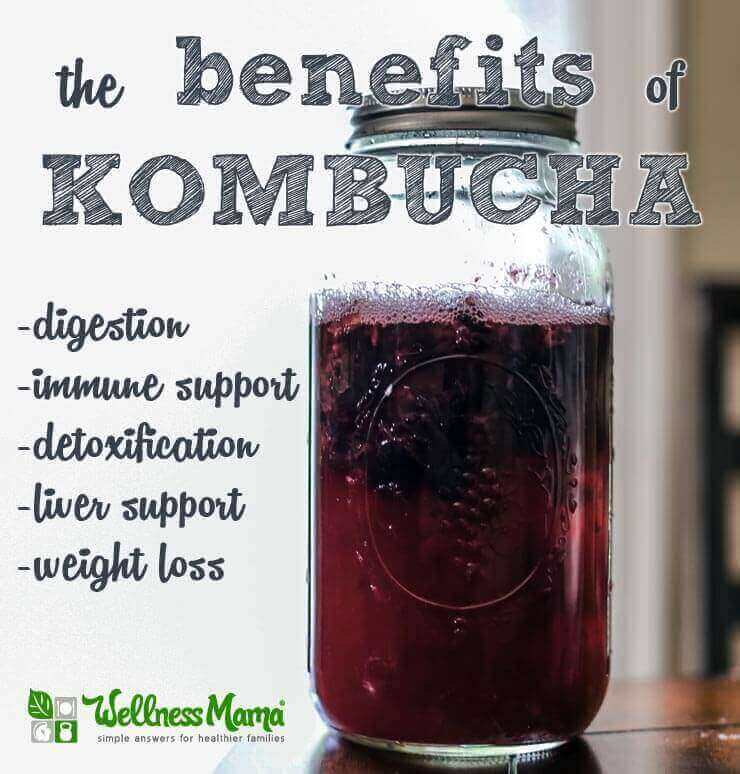
To be clear- it isn’t some magic pill or silver bullet, but it may help the body function well by supporting:
- Liver detoxification
- Improved pancreas function
- Increased energy
- Better digestion
- Improved mood (helps with anxiety/depression)
- Reducing Candida (yeast)
- Helps nutrient assimilation
- May be beneficial for weight loss
These benefits may be partially due to the concentration of beneficial enzymes and acids present in kombucha, including Gluconacetobacter, Lactobacillus and Zygosaccharomyces.
1. Improving Digestion
The research is still out on the specific way Kombucha affects digestion, but we do know that it contains probiotics, enzymes and beneficial acids and these have been researched for their benefits.
Harvard Medical School explains that a healthy gut will have 100 trillion + microorganisms from 500 different identified species. In this sense, we truly are more bacterial than human. There has been a lot of emerging research on the dangers of an overly sanitary environment and how overuse of antibiotics and antibacterial soaps and products is literally changing the structure of our gut.
Drinks like Kombucha, Water Kefir, Milk Kefir, and fermented foods like sauerkraut contain billions of these beneficial bacteria, enzymes and acids that help keep the gut in balance.
2. Natural Detoxification and Liver Support
The liver is one of the body’s main detoxification organs. Kombucha is high in Glucaric acid, which is beneficial to the liver and aids its natural detoxification.
As Kombucha also supports healthy gut bacteria and digestion, it helps the body assimilate food more easily and provides quick and easy energy without caffeine.
3. Immune Boost
Kombucha is naturally high in antioxidants and supportive of the immune system. Again, there is no magic pill or silver bullet when it comes to immune function- it is best to support the body in its natural immune process.
It contains a compound called D-saccharic acid-1,4-lactone (or DSL for short) that has amazing antioxidant properties. This compound is not present in unfermented teas (though many teas are high in other antioxidants). DSL has been specifically identified as beneficial for cellular detoxification.
4. May Support Joint Health
Kombucha is a natural source of compounds called glucosamines, which are often recommended for joint health and to alleviate joint pain. Glucosamines naturally increase hyaluronic acid in the body and helps protect and lubricate the joints. In some trials, hyaluronic acid provided relief similar to over the counter pain killers.
5. More Nutritious Alternative to Soda
Kombucha is a great alternative to sugar-laden drinks like soda. It is naturally carbonated. This means that the secondary fermentation process naturally produces bubbles and carbonation. Sodas, on the other hand, are artificially carbonated by forcing carbonating into the liquid.
This fizzy fermented tea is an attractive alternative to other carbonated beverages and provides probiotics and nutrients not present in soda. Kombucha also contains less sugar than soft drinks. The sugar in the recipe is simply the food for the beneficial bacteria and is largely consumed during the fermentation process.
Important Caveat About The Benefits
I originally wrote about this age-old brewed tea drink years ago, an since that time, I’ve seen thousands of posts claiming it cures everything from cancer to wrinkles. It is important to note that there are no confirmed studies about kombucha’s benefits and safety.
At the same time, there are anecdotal reports of its benefits and many people love its taste and the energy it gives them. Don’t expect kombucha to solve your health problems, but it is a great refreshing drink with some added probiotics.
Potential Risks and Side Effects
I love this ancient fermented tea and consume it often, but there are some cautions and side effects to be aware of when consuming kombucha.
Kombucha Risks and Cautions
- Pregnant and nursing moms and anyone with a medical condition should check with a doctor before consuming. It contains both caffeine and sugar, which should be limited during pregnancy.
- Some people experience bloating from consuming this beverage. This may be in part due to the presence of probiotics and potential changes in gut bacteria. Anyone with a digestive disorder should consult a doctor before consuming.
- If kombucha is made incorrectly, it may contain harmful bacteria and may be dangerous. This is rare but is more common with home brews.
- Preparing kombucha in a ceramic vessel may be dangerous as the acidic brew can leach any lead from this vessel into the finished drink.
Oral Health Concerns
The most logical concern I’ve seen with Kombucha is its potential to cause dental problems. Since it is high in natural acids (but still lower than most sodas) it can be harmful to the teeth. OraWellness wrote a great article on the specific way kombucha affects teeth and how to consume it without harming your teeth.
These steps may also help reduce the potential for the acids in kombucha to affect teeth: drink it all in one sitting, don’t sip it throughout the day and swish with clean water (don’t brush) right after.
Caffeine Content
The base for kombucha is black tea, and some people have concerns about its caffeine content. The amount of caffeine in kombucha varies quite a bit based on the type of tea used and the steep time. In general, it is considered to have less caffeine than soda or coffee. Caffeine content also decreases during fermentation, so the longer the ferment, the less caffeine typically.
If caffeine is a concern, there are several ways to reduce the caffeine content:
- Use a mixture of teas with as little as 20% black tea and lower caffeine teas like green or white to make up the difference.
- Or try herbal teas along with 20% black tea since herbal teas are caffeine free.
- Dump the first steep of the tea and use the second for kombucha. In other words, steep the tea bags or leaves you will use for kombucha in a cup of boiling water for about two minutes. Then, pour this liquid out and then add the tea to the liquid you plan to use to make kombucha. Since the majority of the caffeine is removed during the initial steep, this greatly reduces the caffeine content of the finished product
It is generally not recommended to use decaffeinated tea for kombucha as the caffeine is often removed through a chemical process and the residue may kill the kombucha SCOBY.
Sugar Content
Sugar is used in making kombucha, and for this reason many people are concerned about the sugar content in the finished tea. Fortunately, the majority of the sugar ferments out during the fermentation process. Because the sugar is the food for the bacteria, it is not possible to make without any sugar at all. For this reason, sugar substitutes like stevia and xylitol do not work either.
Alcohol Content
Kombucha does contain a very small amount of alcohol, which has been a source of much controversy in recent years. Sources estimate that store bought brew contains 0.5% to 1.0% alcohol. To put this in perspective, a person would have to drink a six pack of kombucha to approach the alcohol in one beer. In fact, a bottle of kombucha would have a comparable alcohol content to an over-ripe banana.
Store bought brew containing over 0.5% alcohol must be labeled as such and often an ID is required to purchase it. Homemade kombucha also typically contains more alcohol than store bought, though still not much.
How to Make Kombucha
If you decide to venture into the world of homebrewing kombucha, the process is simple, but nuanced. Check out this full tutorial for a full explanation of the process and other methods.
This is the basic process:
- Sterilize all equipment and wash hand thoroughly.
- Make 1 gallon of tea using black tea or a mixture of black tea with green/white tea or herbal teas.
- Add 1 cup of natural sugar. Honey is not recommended and other sugar substitutes do not work.
- Let the sweetened tea cool and place in a 1 gallon or larger glass jar.
- Add 1 cup of brewed raw kombucha (or 2 tablespoons apple cider vinegar).
- Carefully place the SCOBY or “mother” on top of the mixture, ideally floating it on top to seal the mixture off from air.
- If the SCOBY is not the same size as the container, don’t worry. It will grow to fill the container as it ferments.
- Cover the jar with a cheesecloth or piece of organic cloth and a rubber band.
- Let sit at room temperature for 7-12 days to desired tartness.
- Remove the SCOBY and 1 cup of finished kmobucha to start a new batch and repeat steps 1-9.
- If a fizzy finished drink is desired, pour finished kombucha into airtight jars or bottles and add organic juice or fresh/frozen fruit. Add 1 part juice/fruit to 4 parts kombucha.
- Cover tightly and let sit an additional 1-2 days until carbonated.
- Store in the refrigerator in airtight containers until consumed.
Where to Get a SCOBY and Supplies:
If you decide to make your own, it is important to get the SCOBY and supplies from a high-quality source. Find a local friend who already brews and ask for an extra SCOBY. I also highly recommend Kombucha Kamp, a small family-owner company run by my friend and affiliate partners Hannah and Alex. They carry SCOBYs, tea, sugar and all necessary supplies.
Where to Get Kombucha
Don’t want a jar of fermenting tea sitting on your counter perpetually? You’re in luck.
Kombucha has gained popularity in the US recently and is now available in many stores. There are dozens of really good brands and if you choose to buy it, just look for an organic variety without a large amount of sugar or added ingredients. Some of my favorite pre-made brands are:
Probiotic-Rich Kombucha Alternatives
As I mentioned, kombucha contains probiotics and beneficial acids, yet it also has some cautions and side effects. There are many other foods and drinks that are natural sources of probiotics and that don’t carry the same risks.
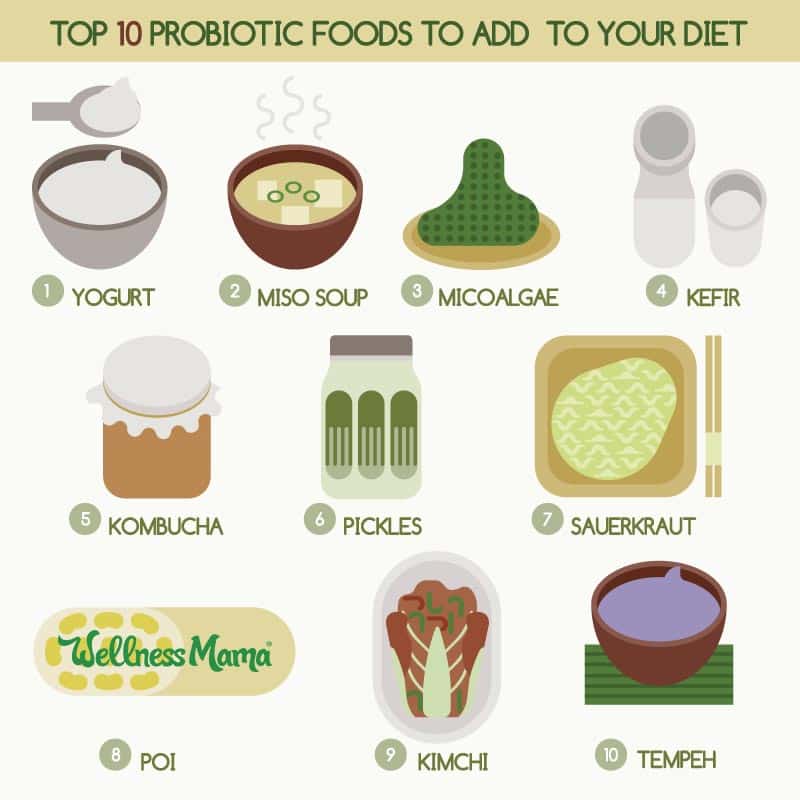
Kombucha is delicious but I’d also suggest branching out into other healthy probiotic foods and drinks like: water kefir, sauerkraut, beet kvass, or homemade ginger ale. These are all great probiotic foods to add to your diet:
Bottom Line
Many people love Kombucha because of its taste. The internet abounds with anecdotal stores of its benefits. Research doesn’t yet support its health-promoting properties, but it is generally considered safe to drink if from a reputable source.
We do know that it is a good source of probiotics, enzymes and beneficial acids and a decent source of B-vitamins. It can be made at home or found at many stores. It may not be a silver bullet for health, but it sure is tasty!
Like with any raw/fermented product, those with any health condition or who are pregnant/nursing should check with a doctor before consuming.
Sources:
R. Jayabalan, P. Subathradevi, S. Marimuthu, M. Sathishkumar, K. Swaminathan, Changes in free-radical scavenging ability of kombucha tea during fermentation, Food Chemistry, Volume 109, Issue 1, 1 July 2008, Pages 227-234, ISSN 0308-8146, http://www.sciencedirect.com/science/article/pii/S0308814607012940.
Sheng-Che Chu, Chinshuh Chen, Effects of origins and fermentation time on the antioxidant activities of kombucha, Food Chemistry, Volume 98, Issue 3, 2006, Pages 502-507, ISSN 0308-8146, http://www.sciencedirect.com/science/article/pii/S0308814605005364.
P. Semjonovs, I. Denina and R. Linde, 2014. Evaluation of Physiological Effects of Acetic Acid Bacteria and Yeast Fermented Non-alchocolic Beverage Consumption in Rat Model. Journal of Medical Sciences, 14: 147-152.
C. Dufresne, E. Farnworth, Tea, Kombucha, and health: a review, Food Research International, Volume 33, Issue 6, July 2000, Pages 409-421, ISSN 0963-9969, http://www.sciencedirect.com/science/article/pii/S0963996900000673.
Determination of D-saccharic acid-1,4-lactone from brewed kombucha broth by high-performance capillary electrophoresis.
Do you drink it? Do you make it? Have you experienced any benefits from taking it? Share with me below!
Continue Reading...The Benefits of Kombucha
source http://wellnessmama.com/23994/kombucha-benefits/?utm_source=rss&utm_medium=rss&utm_campaign=kombucha-benefits